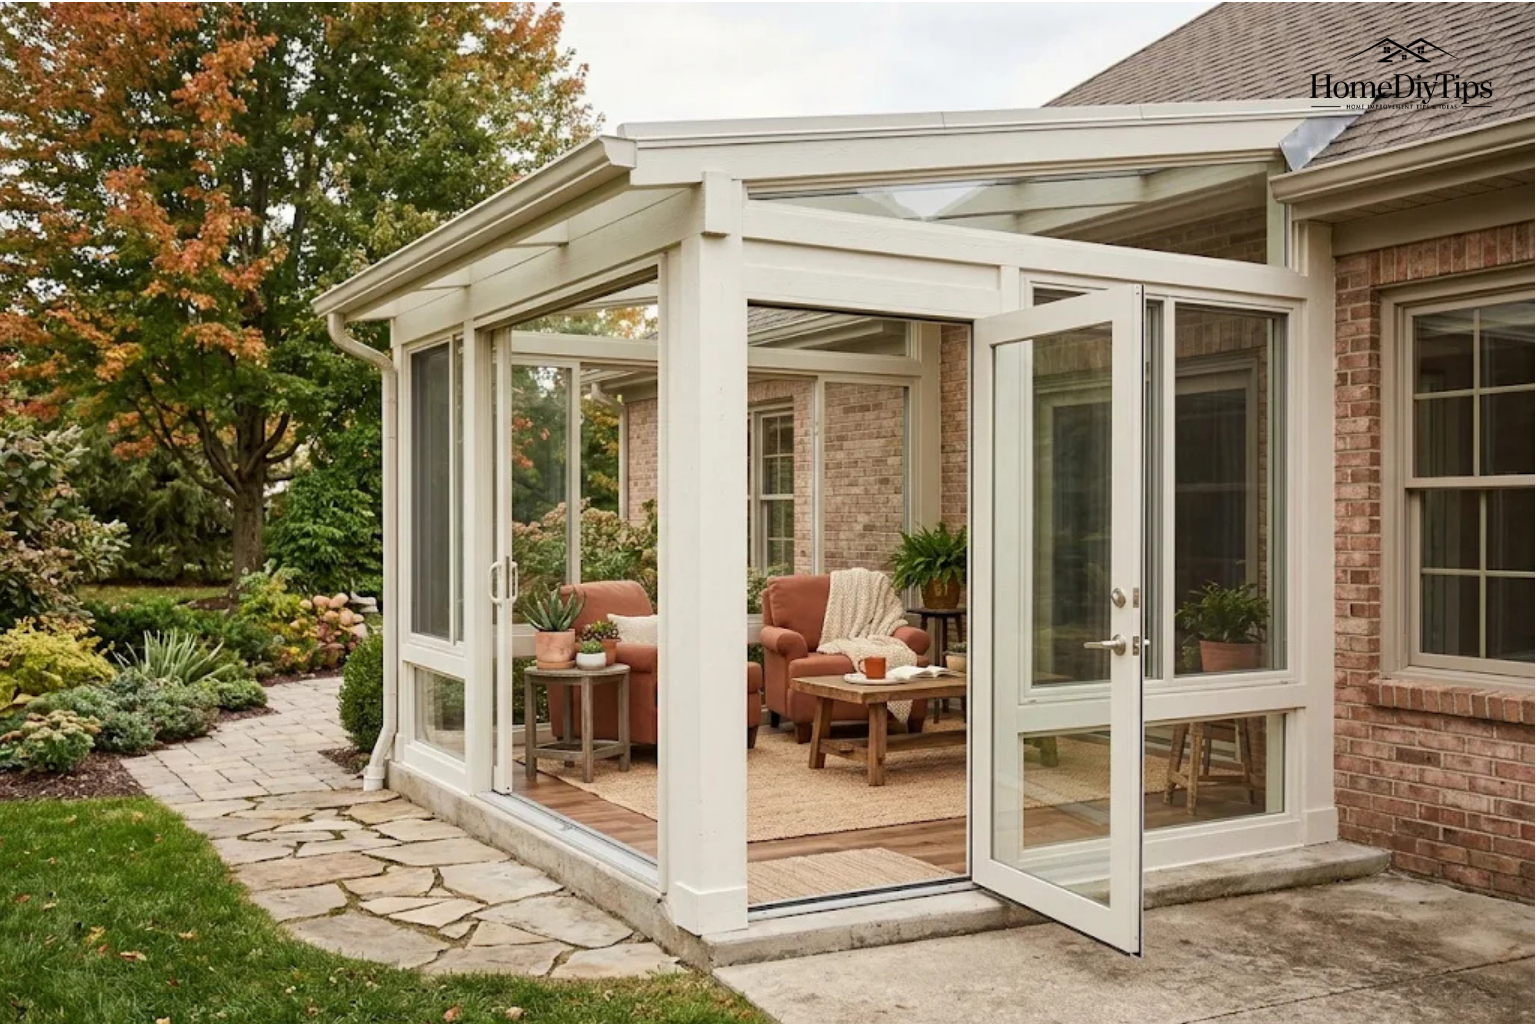
An enclosed patio attached to a house creates a more sheltered place to relax, eat, or enjoy the backyard. The right design depends on how much weather protection you need: a screen room blocks many insects while keeping the breeze, a three-season room adds more protection, and an insulated four-season sunroom is designed for more regular year-round use.
Before choosing a design, check whether your existing patio, deck, and roof can support the enclosure. You may need structural work or a new foundation, and local permits may apply. Costs also vary widely: HomeGuide estimates 2,000–5,000 to add screens to an existing covered patio, while a room with walls and windows can cost tens of thousands of dollars. These are published estimates, not quotes for your home.
Direct Answer
An enclosed patio attached to a house is a sheltered outdoor area enclosed with screens, glass, or walls. The right type depends on your budget, climate, and whether you need seasonal or year-round comfort.
Practical Home Tip
Before comparing designs, inspect the patio’s roof, slab or deck, and drainage. Get estimates with the same project scope, and separate kit materials from labor, permits, and structural work.
What Is an Enclosed Patio Attached to a House?
An enclosed patio is an outdoor area with screens, glass panels, or solid walls. An attached version connects to the house and may use an existing roof or a new one. Related terms include enclosed porch, patio enclosure, screen room, and sunroom, but they do not always mean the same thing.
A covered patio has a roof but open sides. A screened patio adds mesh walls for airflow and insect protection. A sunroom uses windows or glass panels, while a four-season room is typically insulated for more controlled indoor comfort.
What Is an Enclosed Patio Called?
The name depends on construction and intended use. A “screen room” has mesh sides; a “three-season room” adds more shelter but often has limited insulation; a “four-season sunroom” is designed for insulation and heating or cooling.
These labels are useful starting points, not universal code definitions. Check the materials, insulation, windows, and permitted use of the specific design.
Is It Automatically Living Space?
No. Enclosing a patio does not automatically make it legal living space or mean that its area can be added to a home’s reported square footage. Insulation, heating and cooling, ceiling height, access, permits, and local rules may affect classification. Check local building requirements and ask a qualified real estate or appraisal professional how the finished area should be reported.
Enclosed Patio Ideas for Different Budgets
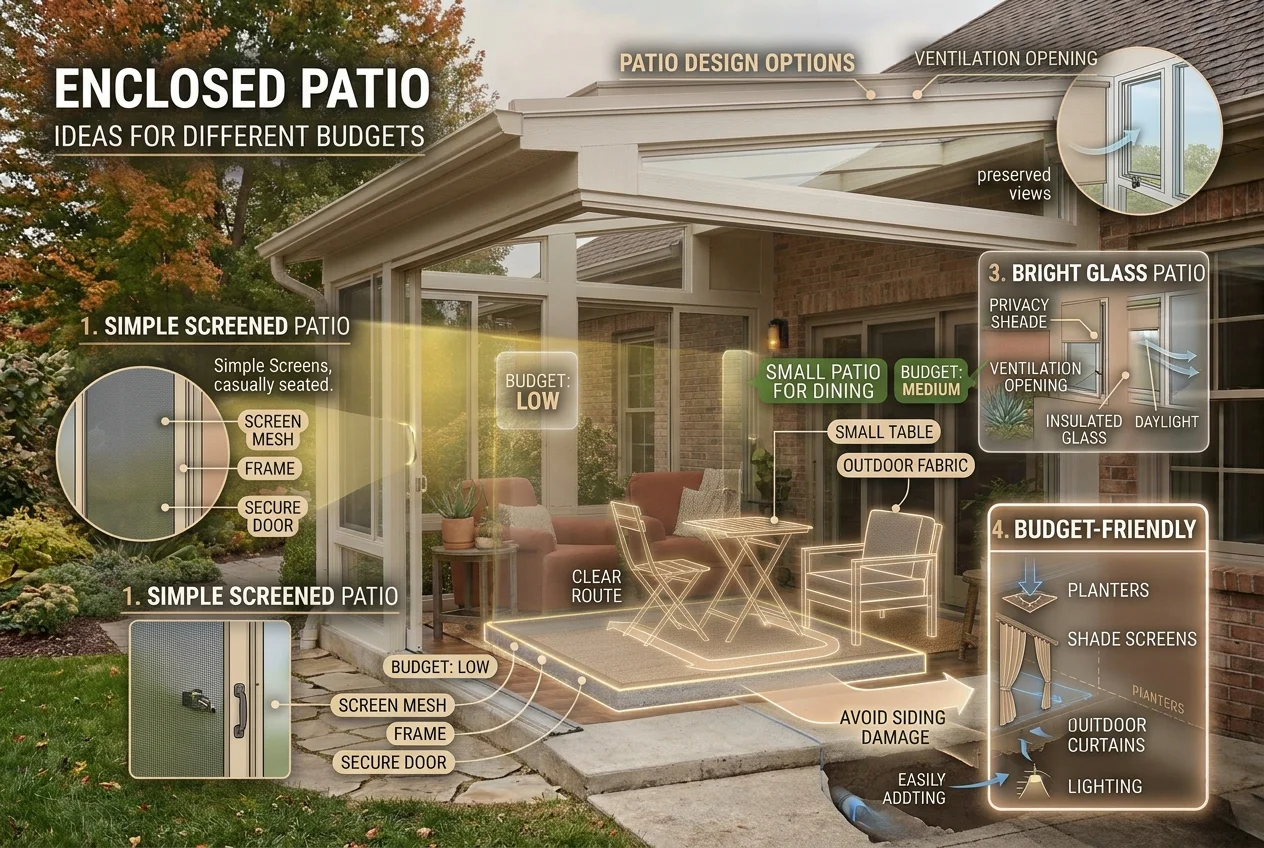
The best design begins with how you will use the space. A patio for summer dinners needs different features from a room intended for quiet reading during cold weather.
1. A Simple Screened Patio
If the patio already has a sound roof and floor, adding screens can reduce insects without blocking the breeze. Choose a system made for your opening sizes and weather exposure, with a door that latches securely.
This design suits outdoor dining and casual seating in mild weather. It will not block all dust, pollen, wind-driven rain, or cold air, and it does not provide the comfort of an insulated room.
2. A Small Enclosed Patio for Dining or Relaxing
A compact patio can fit a small table, two chairs, a bench, or folding furniture. Keep the route from the house door clear; in a narrow space, placing furniture along one side may leave better room to move.
Choose easy-clean, outdoor-rated fabrics and surfaces. For new wiring or outlets, use a qualified electrician where required.
3. A Bright Glass-Enclosed Patio
Glass panels preserve views and let in daylight, making them appealing for a sitting area or plant corner. Large glass areas can also create glare and unwanted heat, so window performance, shade, and ventilation matter as much as appearance.
Repeat one or two finishes from the house, such as the frame color or trim, to help the enclosure look connected to the home.
4. Budget-Friendly Upgrades to an Existing Patio
You may not need a full enclosure immediately. Depending on local rules, shade screens, outdoor curtains, lighting, movable planters, or privacy panels can make a patio more useful.
These are comfort upgrades, not substitutes for a code-compliant enclosure. Lightweight panels may not resist strong wind or rain; avoid attachments that damage siding or trap moisture.
How to Choose the Right Size and Layout
Measure the usable floor area before ordering a kit or planning furniture. Record the length and width, doors, steps, roof supports, and windows that must remain accessible. Note where rainwater runs and which way the floor slopes.
Sketch the furniture you want and leave room to move around it and open doors fully. A layout may feel cramped if the entry path cuts through the seating area.
Think about sunlight at different times of day. A west-facing glass wall can receive strong afternoon sun, while a shaded patio may need better lighting. The U.S. Department of Energy explains that window placement affects daylight, glare, and heat gain in its daylighting guidance.
Consider privacy, too. A side wall, shade, or plants may block views without closing every opening. Plan operable windows or screens where they can provide suitable airflow.
Furniture is only one limit on size. The existing slab or deck, drainage, roof structure, property setbacks, and local rules may also constrain the design.
Screen Room vs. Three-Season Room vs. Sunroom
The main differences are the amount of weather protection, insulation, and temperature control. Product features vary, so check a specific system’s specifications rather than relying on its label alone. The Patio Enclosures comparison chart illustrates how frames, glass, screens, and roof choices differ among enclosure types.
|
Type |
Common features |
Best suited for |
Main trade-off |
|
Screen room |
Roof and mesh walls |
Bug protection, fresh air, warm-weather use |
Offers little protection from cold, dust, and wind-driven rain |
|
Three-season room |
Glass or vinyl panels, sometimes screens; limited insulation |
Mild weather and use across much of spring, summer, and fall |
Can become uncomfortable during very hot or cold weather |
|
Four-season sunroom |
Insulated structure and windows; heating or cooling may be added |
More regular use through the year |
Higher construction and energy-system costs |
|
Solarium |
Extensive glass walls and often a glass roof |
Maximum daylight and garden views |
Heat, glare, cleaning, and cost need careful planning |
A screen room makes sense if the main goal is to enjoy fresh air while reducing insects. A three-season room gives more protection but should not be assumed to remain comfortable in winter. A four-season sunroom is closer to an indoor room, but it needs an appropriate design for insulation, air leakage, and heating or cooling.
A solarium can look striking, yet all that glass is not automatically more comfortable. Ask how the glazing, roof, ventilation, and shading are designed for your climate.
How Much Does an Enclosed Patio Cost?
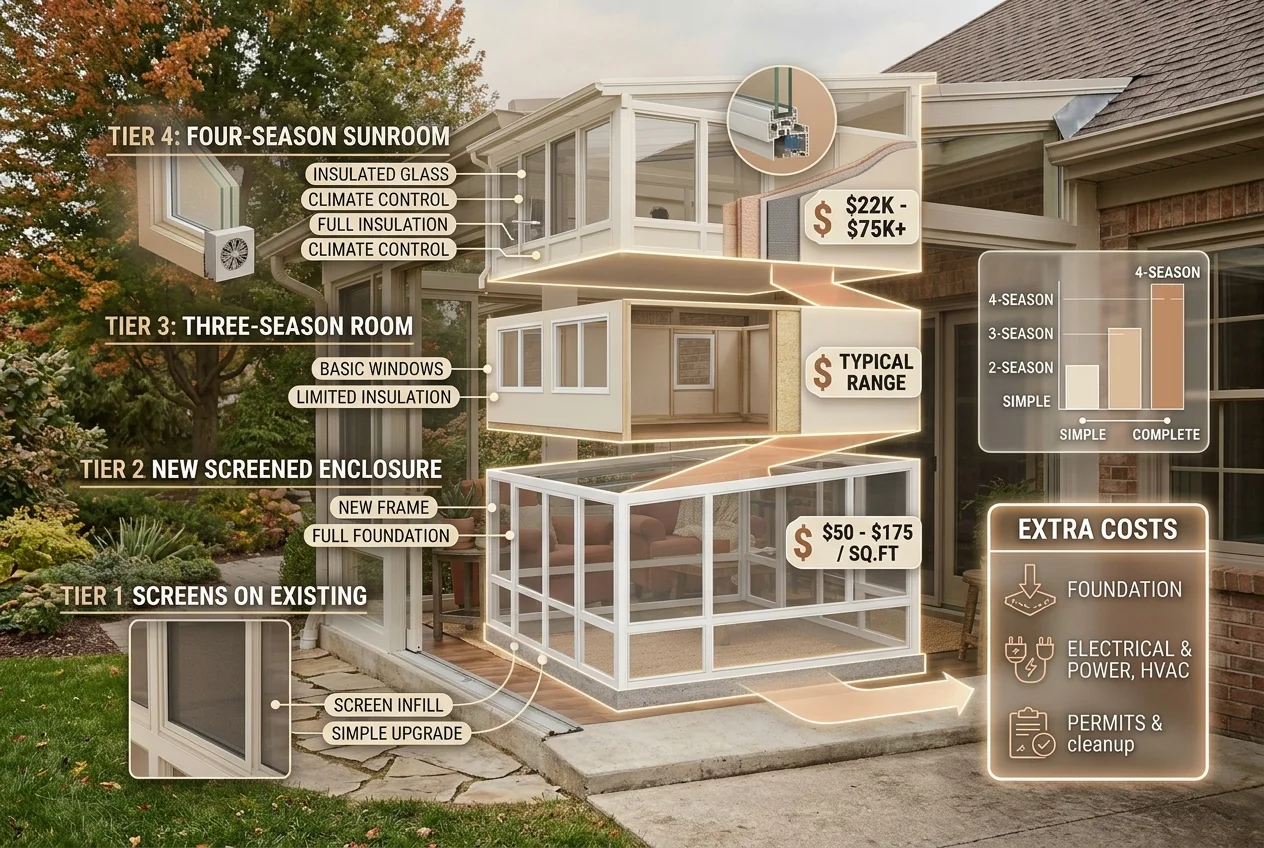
There is no single price for an enclosed patio attached to a house. Screening an existing covered patio costs less than building a new structure with windows, insulation, and climate control. Site preparation, local labor, materials, and house connections affect the total.
These published U.S. estimates were reviewed in October 2026. Treat them as planning ranges, not guaranteed prices.
|
Project type |
Published estimate |
What the estimate covers |
| Screens added to an existing covered patio |
10–25 per square foot; about 2,000–5,000 for 200 sq. ft. |
Screen enclosure around an existing covered space |
|
New screened patio enclosure |
50–175 per square foot |
A new base, framing, posts, roof, and screens |
|
Prefabricated DIY enclosure kit |
About 1,500–5,000 |
Materials only; kits vary in size and panel type |
|
Three-season room |
80–230 per square foot |
Typical installed estimate on a prepared site; often limited insulation |
|
Four-season sunroom |
200–400 per square foot |
Typical installed estimate on a prepared site with insulated windows and more complete construction |
| Enclosed patio with walls and windows | About 20,000–70,000 for 200 sq. ft. |
HomeGuide’s estimate for materials and labor, excluding variable site preparation |
The ranges come from HomeGuide’s 2026 patio enclosure cost guide. HomeAdvisor’s 2026 guide reports an average of $17,820, with most projects between $8,701 and $28,366. That broader range is not directly comparable to a fully insulated sunroom.
Angi’s August 2026 guide estimates many new sunroom additions at 22,000–75,000. Because the sources group projects differently, do not combine them into one precise national price.
Extra Costs That Can Change Your Budget
Ask whether each quote includes the following:
- Foundation or deck work: A slab may need repair, reinforcement, or replacement. An elevated deck may not be designed for the added weight of walls, glass, or a roof.
- Roof and house connection: Flashing, framing changes, gutters, and drainage details can add work.
- Doors and windows: Larger openings, insulated glass, custom sizes, and sliding doors can increase the bill.
- Electrical and climate control: Lighting, outlets, fans, heating, and air conditioning may need new equipment and qualified installation.
- Permits and plans: Some projects require drawings, permit fees, inspections, or professional design work.
- Finishing and cleanup: Flooring, trim, paint, furniture, landscaping, and disposal of construction waste may not be included.
Ask for an itemized estimate separating materials, labor, site preparation, permits, and upgrades. Compare the same scope across quotes; a lower price may simply leave out work included elsewhere.
DIY Enclosed Patio or Professional Construction?
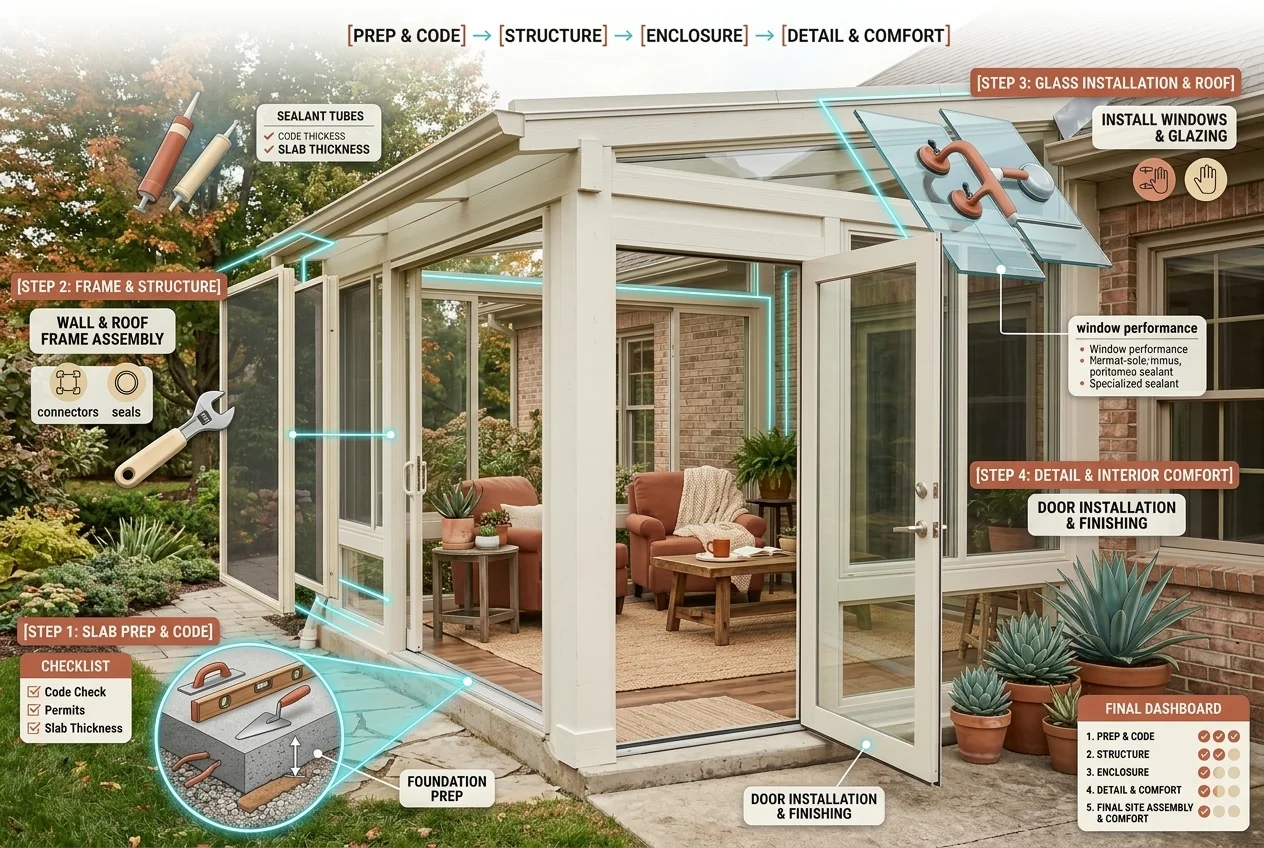
A DIY enclosure kit may suit a simple project when the patio already has a stable, level base and a suitable roof. HomeGuide lists prefabricated kits at roughly 1,500–5,000 for materials, depending on the design and panels. Check what the package actually includes: some kits provide screen walls and a roof, while others offer polycarbonate or acrylic panels. The price may not cover the foundation, delivery, tools, installation, permits, or weatherproofing where the enclosure meets the house.
Before buying, check the manufacturer’s instructions for dimensions, foundation, attachment, wind limits, and maintenance. Confirm the kit suits your installation and climate; an online product is not right for every roof or site.
Get professional help if the project changes the roof or exterior wall, needs a foundation, encloses an elevated deck, or adds electrical or HVAC systems. A qualified contractor can identify structural work, permit needs, and other specialists.
Ask each contractor for a written scope covering materials, labor, structural work, permits, cleanup, warranties, and exclusions. Check applicable license and insurance requirements and review recent references.
What to Check Before Building an Attached Enclosure
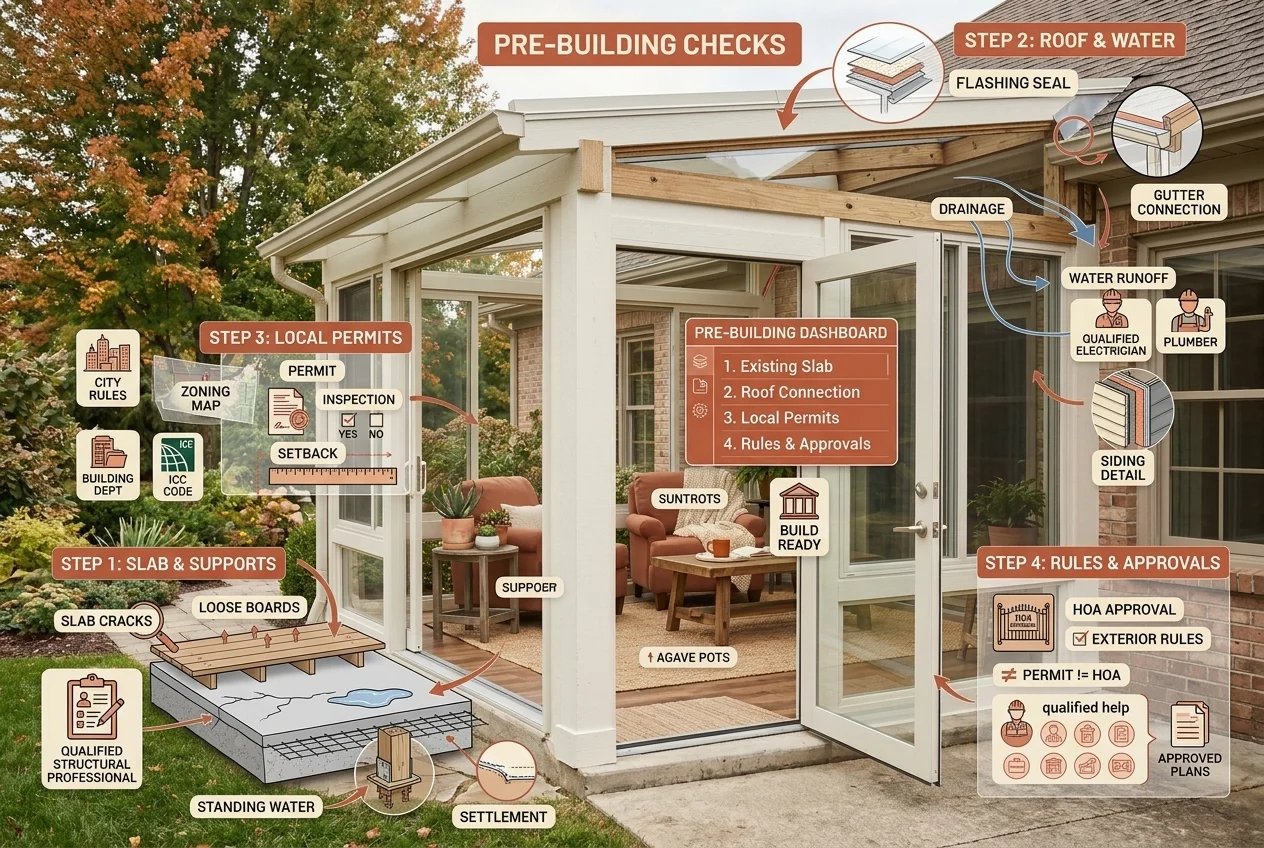
Do these checks before buying materials or asking a contractor to finalize the design.
Check the Existing Slab, Deck, and Supports
Look for cracks, loose boards, rot, movement, standing water, or signs that the patio has settled. These signs do not prove a structure is unsafe, but a surface that looks sound is not proof it can support walls, glazing, roof loads, wind, or snow.
If the enclosure will sit on an elevated deck, or if you are unsure about the slab, supports, or footings, have a qualified structural professional assess the structure before building. Reinforcement or a new foundation may be needed.
Plan the Roof Connection and Water Drainage
An attached enclosure must manage water where its roof or frame meets the house. Poor detailing can let water enter siding or wall cavities, leading to rot or damage that may remain hidden. The roof also needs a suitable slope, support, and drainage path for its design and local weather.
Ask how flashing, seals, gutters, and runoff will be managed. Keep sprinklers from repeatedly spraying the walls. If water collects beside the house, fix the drainage problem first.
Do not cut roofing, remove structural framing, or alter the home’s weather barrier based only on an online diagram. Details depend on the existing construction and chosen system; use approved plans and qualified help.
Check Local Permits, Setbacks, and Building Rules
Rules vary by city and county. A screen addition may be treated differently from a room with a new roof, foundation, electrical work, or HVAC. Zoning may also limit how close the structure can sit to a property line.
Before work starts, describe the project’s size and features to your local building department. Ask about permits, zoning, inspections, and wind or snow requirements. The International Code Council’s residential code is a model code; the rules adopted locally control.
If you have a homeowners’ association, check its exterior-change rules. Association approval does not replace a required permit.
Windows, Materials, and Seasonal Comfort
Screens, glass, and polycarbonate panels each solve different problems. Screens provide airflow and insect protection, but little shelter from cold air. Glass blocks wind and rain more effectively when properly installed, but ordinary glass alone does not insulate a room. Polycarbonate may be lighter than glass, though its clarity, durability, heat performance, and care requirements depend on the product.
For a room you hope to use year-round, ask about the complete wall, floor, roof, window, and door system—not just the glass. Insulation and air sealing matter, as does whether the room can be heated and cooled effectively.
The U.S. Department of Energy explains that two important window ratings are U-factor and solar heat gain coefficient (SHGC). U-factor describes how readily heat passes through a window; SHGC describes how much solar heat it allows through. The right balance depends on climate, orientation, and comfort goals. See the Department of Energy’s window and door efficiency guidance.
Ventilation matters too. A sunny glass room can become hot, while a tightly enclosed room may feel stuffy if fresh air is not planned. Consider operable windows, exterior shade, and airflow paths. A fan can improve air movement but does not replace proper ventilation or climate control.
Maintenance and Common Planning Mistakes
Plan maintenance around the materials and local weather. Keep gutters and drainage paths clear, inspect seals and flashing, and clean screens or glazing as directed. Watch for water stains, damp trim, condensation, loose fasteners, or changes in the floor or frame. Find the cause before covering a problem with paint or caulk.
Common mistakes include:
- Choosing by appearance alone. Glass may need shade, insulation, or cooling.
- Assuming the old patio is ready. Slabs, footings, and decks may not support the new structure.
- Forgetting added costs. Kit prices may exclude delivery, installation, permits, and utilities.
- Treating a seasonal room as year-round space. Screens and single-pane panels provide limited comfort.
- Ignoring water control. Poor roof connections or blocked gutters can damage the house.
- Expecting guaranteed added value. Resale depends on quality, permitted use, and local demand.
If your area gets heavy snow, follow the enclosure manufacturer’s limits and local guidance for snow loads. Do not climb onto a roof or attempt risky snow removal without the right equipment and training.
Frequently Asked Questions
What Do You Call a Covered Patio Attached to a House?
A roofed area with open sides is a covered patio. Add mesh walls and it may be called a screened patio or screen room. A space with windows or glazing is often called an enclosed porch or sunroom.
How Much Does It Cost to Build a Covered Patio Attached to a House?
A roof-only patio costs differently from an enclosed room. HomeGuide estimates 2,000–5,000 to add screens to an existing covered patio of 200 square feet; walls and windows can cost much more. Get a quote based on your structure and local labor.
How Much Value Does an Enclosed Patio Add to a Home?
There is no universal amount. Value depends on local demand, construction quality, maintenance, and whether the space qualifies as a living area. Do not assume the project cost will be recovered at resale.
Is It Worth It to Enclose a Patio?
It may be worth it if you will use the space often and the enclosure fits your climate and budget. A screen room is suited to seasonal use; a four-season room costs more but can offer greater comfort. Weigh the full cost against how often you expect to use it.
Is an Enclosed Patio Considered Living Space?
Not automatically. Local rules, insulation, heating and cooling, ceiling height, access, permits, and property-reporting standards may matter. Check code requirements locally and ask a qualified real estate or appraisal professional how to report the finished area.
Your Next Step: Match the Enclosure to Your Home
Start by deciding whether you mainly want bug protection, shelter through mild seasons, or year-round comfort. Then check the existing patio and local requirements before committing to a design. With those answers in hand, you can compare like-for-like estimates and choose an enclosure that fits your home, climate, and budget.
Disclaimer
Costs, building conditions, and permit requirements vary by home and location. Before changing structural elements, modifying the roof connection, or adding electrical or HVAC systems, confirm local requirements and seek qualified help for work that requires specialist knowledge.