Bathroom mold can appear on shower tiles, grout lines, silicone caulk, walls, and ceilings. It often grows where moisture stays for too long. Cleaning the visible spots is important, but removing the moisture that supports mold growth is just as necessary.
If you want to know how to get rid of mold in bathroom areas safely, start by identifying the affected surface and the size of the problem. Clean suitable hard surfaces with detergent and water, scrub away visible growth, rinse where appropriate, and dry the area completely.
The best approach to how to get rid of mold in bathroom spaces also includes checking for leaks, improving ventilation, and reducing excess humidity. Damaged caulk and mold-affected porous materials, such as drywall, may need replacement rather than repeated cleaning.
You do not always need strong chemicals or expensive cleaning products. The right method depends on the affected surface, the size of the problem, and whether water damage is present.
Short Definition
Remove bathroom mold from suitable hard surfaces with detergent and water, scrub and dry thoroughly, and fix leaks or ventilation problems to help prevent future growth.
Experience
Bathroom mold often returns when moisture remains trapped around grout, caulk, or poorly ventilated corners. Check these areas regularly, and remember that damaged caulk or mold-affected drywall may need replacement rather than repeated cleaning.
What Actually Gets Rid of Bathroom Mold?
The most practical way to remove bathroom mold is to clean the affected surface and correct the moisture problem.
Mold needs moisture to grow. Bathrooms provide plenty of it through hot showers, wet floors, dripping faucets, and poor ventilation. When moisture remains on surfaces or enters walls, mold can develop.
For small areas of growth on suitable hard surfaces, follow these basic steps:
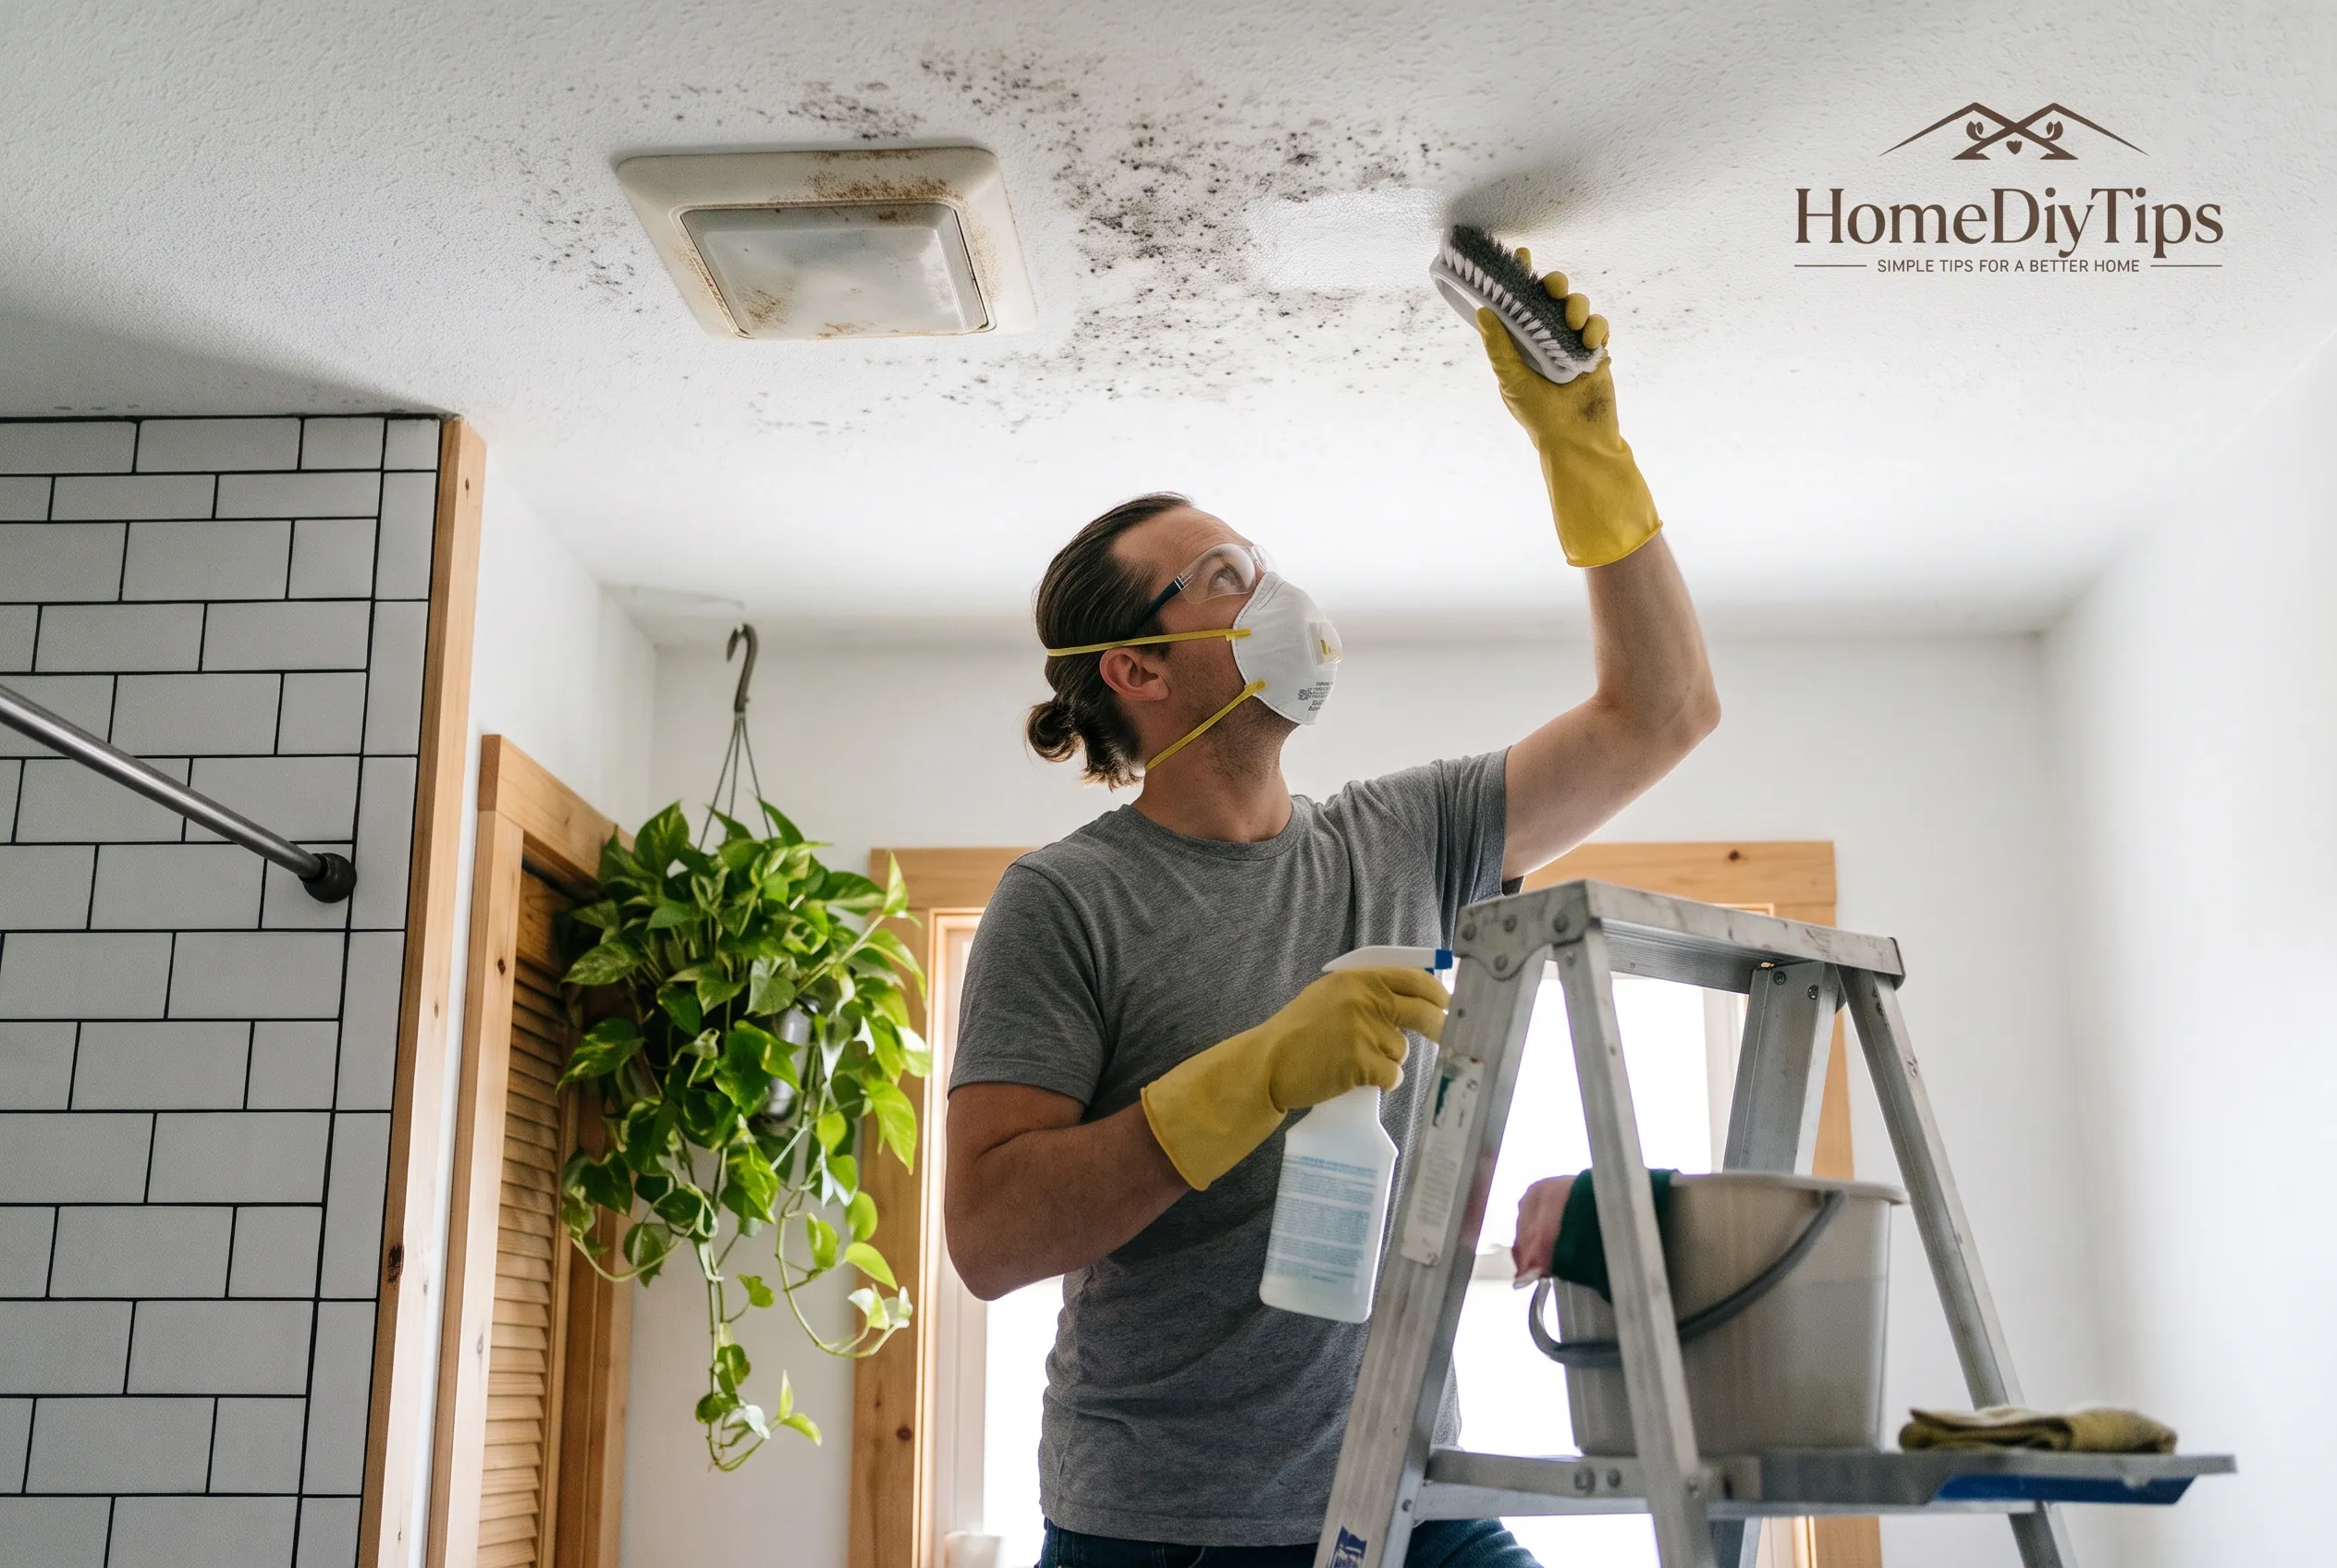
- Put on suitable protective equipment, including gloves, goggles, and an N95 respirator.
- Improve ventilation by opening a window or providing fresh air.
- Clean the affected hard surface with detergent and water.
- Scrub away visible mold using a suitable brush or cleaning cloth.
- Rinse the surface when appropriate and dry it completely.
- Find and repair the source of moisture.
- Check the area regularly for signs of returning mold.
The Environmental Protection Agency (EPA) explains that mold should be physically removed from surfaces. Simply killing it is not enough because dead mold can still cause reactions in sensitive people.
This is why painting over mold or spraying a chemical on it without cleaning the surface is not a complete solution.
Also, remember that not every material can be cleaned successfully. Tile and glass are generally easier to clean than water-damaged drywall or other porous materials. Some damaged materials may need removal and replacement.
Before You Clean: Check the Mold and Protect Yourself
Before choosing a cleaning product, look at the affected area. Its location and size will help you decide whether ordinary household cleaning is suitable.
Check How Much Mold You Have
The EPA uses approximately 10 square feet as a general guide when deciding whether a homeowner can handle mold cleanup.
An area smaller than this can often be cleaned without professional help, provided there are no other serious problems. Larger areas may require professional advice.
This is a general guideline, not a guarantee that every small mold problem is safe to handle yourself.
Pay attention to these warning signs:
- Mold covering several large sections of a wall or ceiling.
- A strong musty smell that remains after ordinary cleaning.
- Water stains, soft drywall, or peeling paint.
- Mold returning quickly after repeated cleaning.
- Signs of water damage behind bathroom fixtures.
- Possible contamination from sewage or heavily contaminated water.
Do not remove large sections of drywall or open walls just to investigate mold. Hidden contamination can spread during careless removal.
Wear Suitable Protective Equipment
Mold cleanup can release spores and small particles into the air. Protective equipment helps reduce contact with them.
Prepare:
- N95 respirator: Helps reduce the amount of airborne mold particles you breathe.
- Rubber or suitable cleaning gloves: Protect your hands from cleaning products and contaminated material.
- Safety goggles: Help protect your eyes from splashes and particles.
- Long-sleeved clothing: Reduces direct contact with the affected area.
Use fresh air during cleaning. Open a window or door where possible, and avoid directing strong airflow across a moldy surface in a way that spreads dust into other rooms.
People with asthma, mold allergies, chronic lung conditions, or weakened immune systems should avoid cleaning mold themselves. They may need help from someone who can handle the cleanup safely.
The CDC mold cleanup guidelines provide additional advice about protective equipment and people who should avoid mold cleanup.
Never Mix Cleaning Chemicals
This rule is especially important in small bathrooms.
Never mix bleach with vinegar, ammonia, or other cleaning products. Dangerous gases can form, even when the products are used for ordinary household cleaning.
Use one cleaning product at a time. Read its label, follow the instructions, and rinse surfaces before switching products when the product instructions require it.
How to Get Rid of Mold in Bathroom From Different Surfaces
A cleaning method that works for tiles may not work for drywall or damaged silicone caulk. Follow the material rather than using one treatment throughout the bathroom.
How to Remove Mold From Bathroom Tiles and Grout
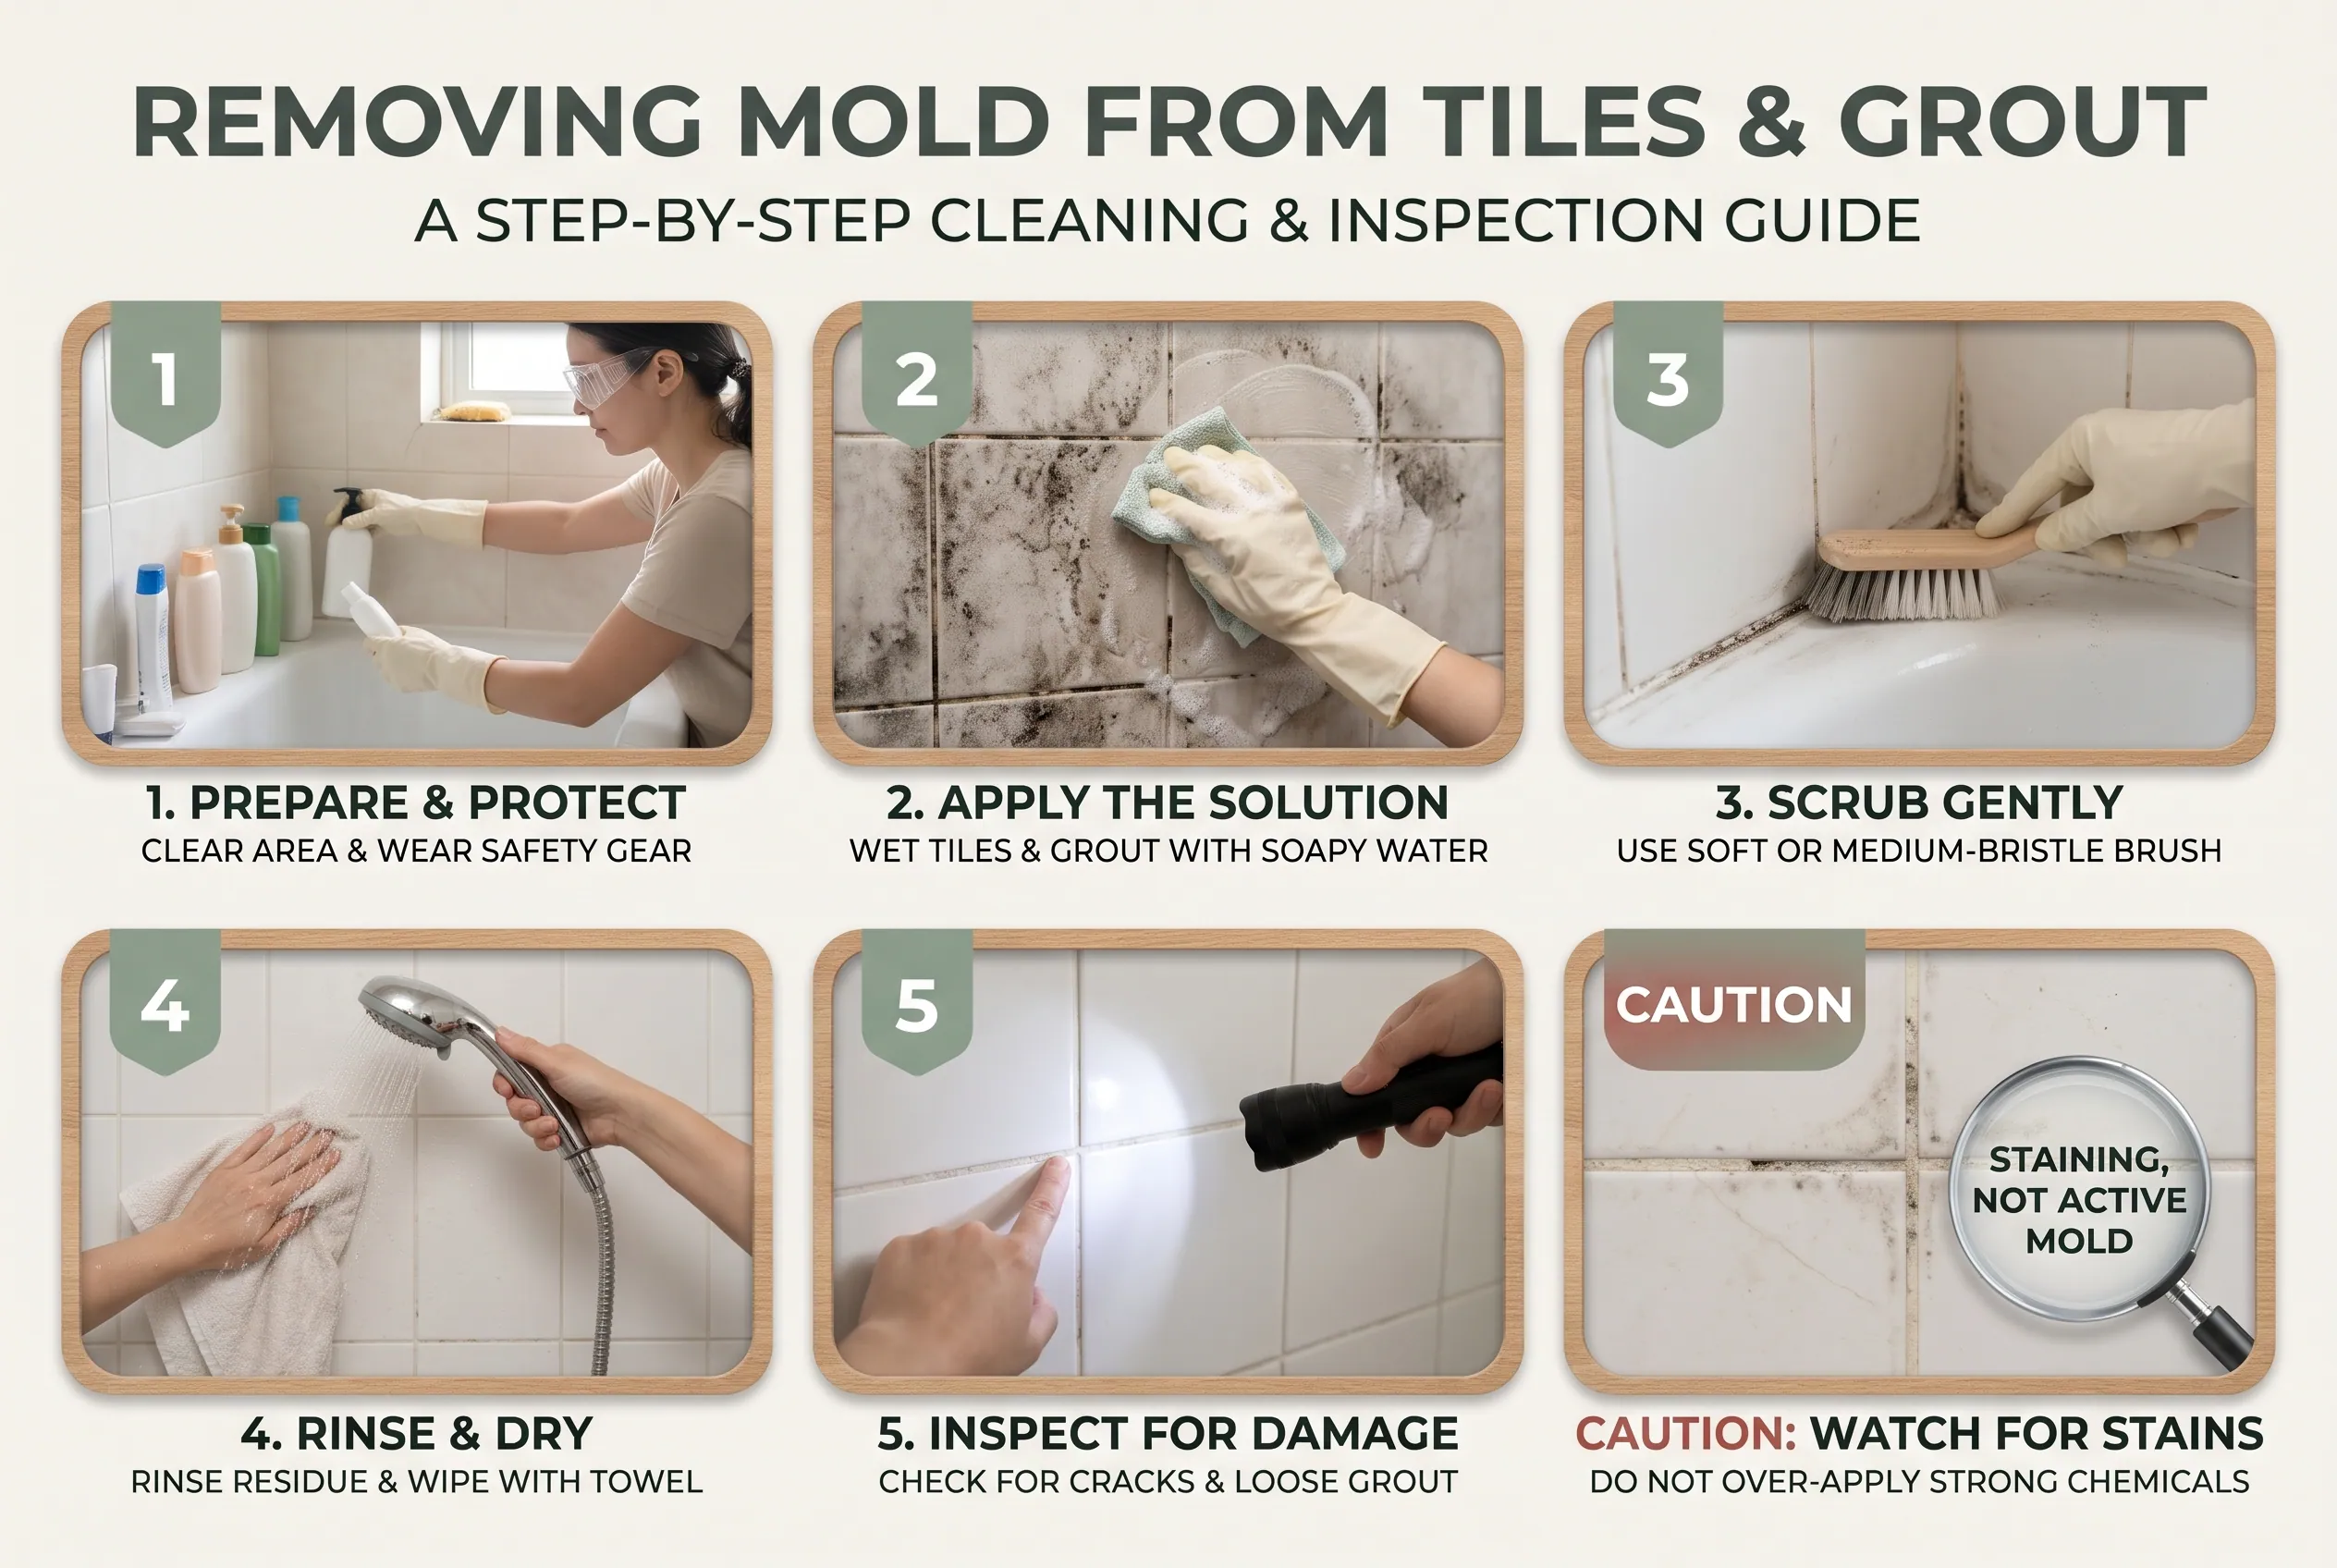
Bathroom tiles are usually easier to clean because glazed ceramic and porcelain have relatively nonporous surfaces. Grout is different. It contains tiny spaces that can hold water and dirt.
You can often remove surface mold from both with careful cleaning.
What you need:
- Mild household detergent.
- Warm water.
- A soft or medium-bristle cleaning brush.
- Cleaning cloths.
- Gloves and suitable eye protection.
Cleaning steps:
- Remove shampoo bottles, soap dishes, and other items from the affected area.
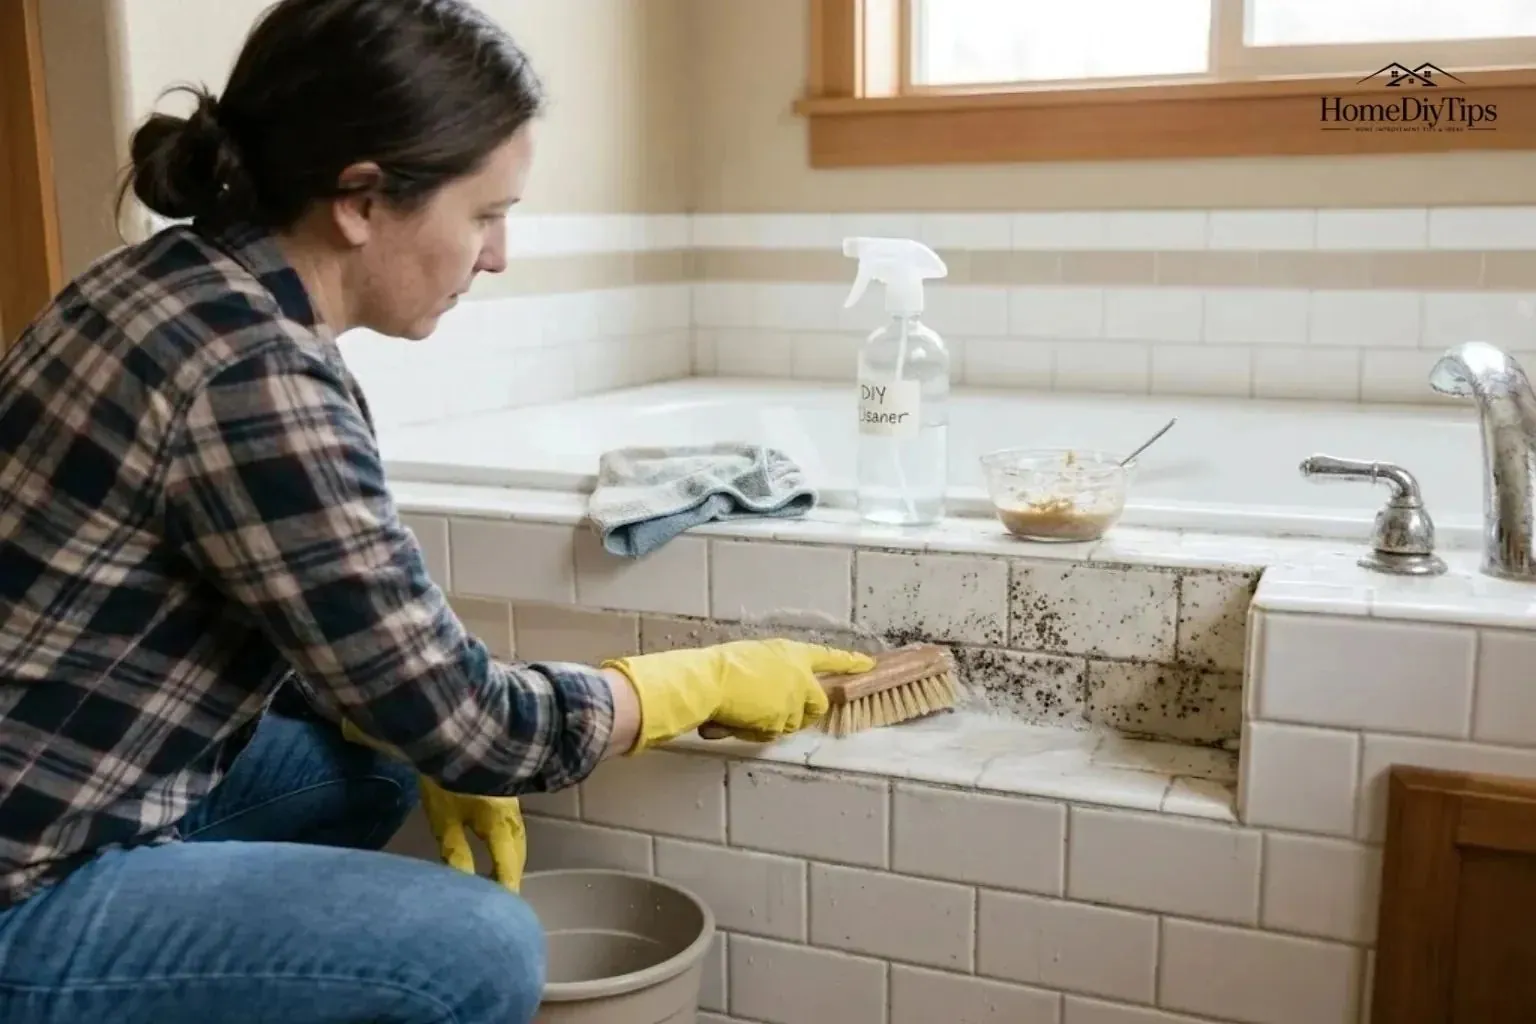
- Wet a cleaning cloth with a mixture of detergent and water.
- Apply the solution to the moldy tiles and grout.
- Scrub the affected areas carefully with a suitable brush.
- Pay attention to grout lines, corners, and spaces around fixtures.
- Rinse away cleaning residue where appropriate.
- Dry the tiles and grout with a clean towel.
Avoid using an overly stiff brush that could damage grout or scratch delicate surfaces.
After cleaning, inspect the grout. If it is cracked, loose, or missing, ordinary cleaning will not repair it. Damaged grout may need suitable repair or replacement.
Also check the joints between tiles and bathroom fixtures. Cracks can allow water to enter areas that are difficult to dry.
Practical check: After cleaning, look at the grout again when the surface is dry. Remaining dark discoloration does not always mean active mold is still present. It may be staining or damaged material. Investigate further rather than repeatedly applying stronger chemicals.
How to Remove Mold From Shower Caulking
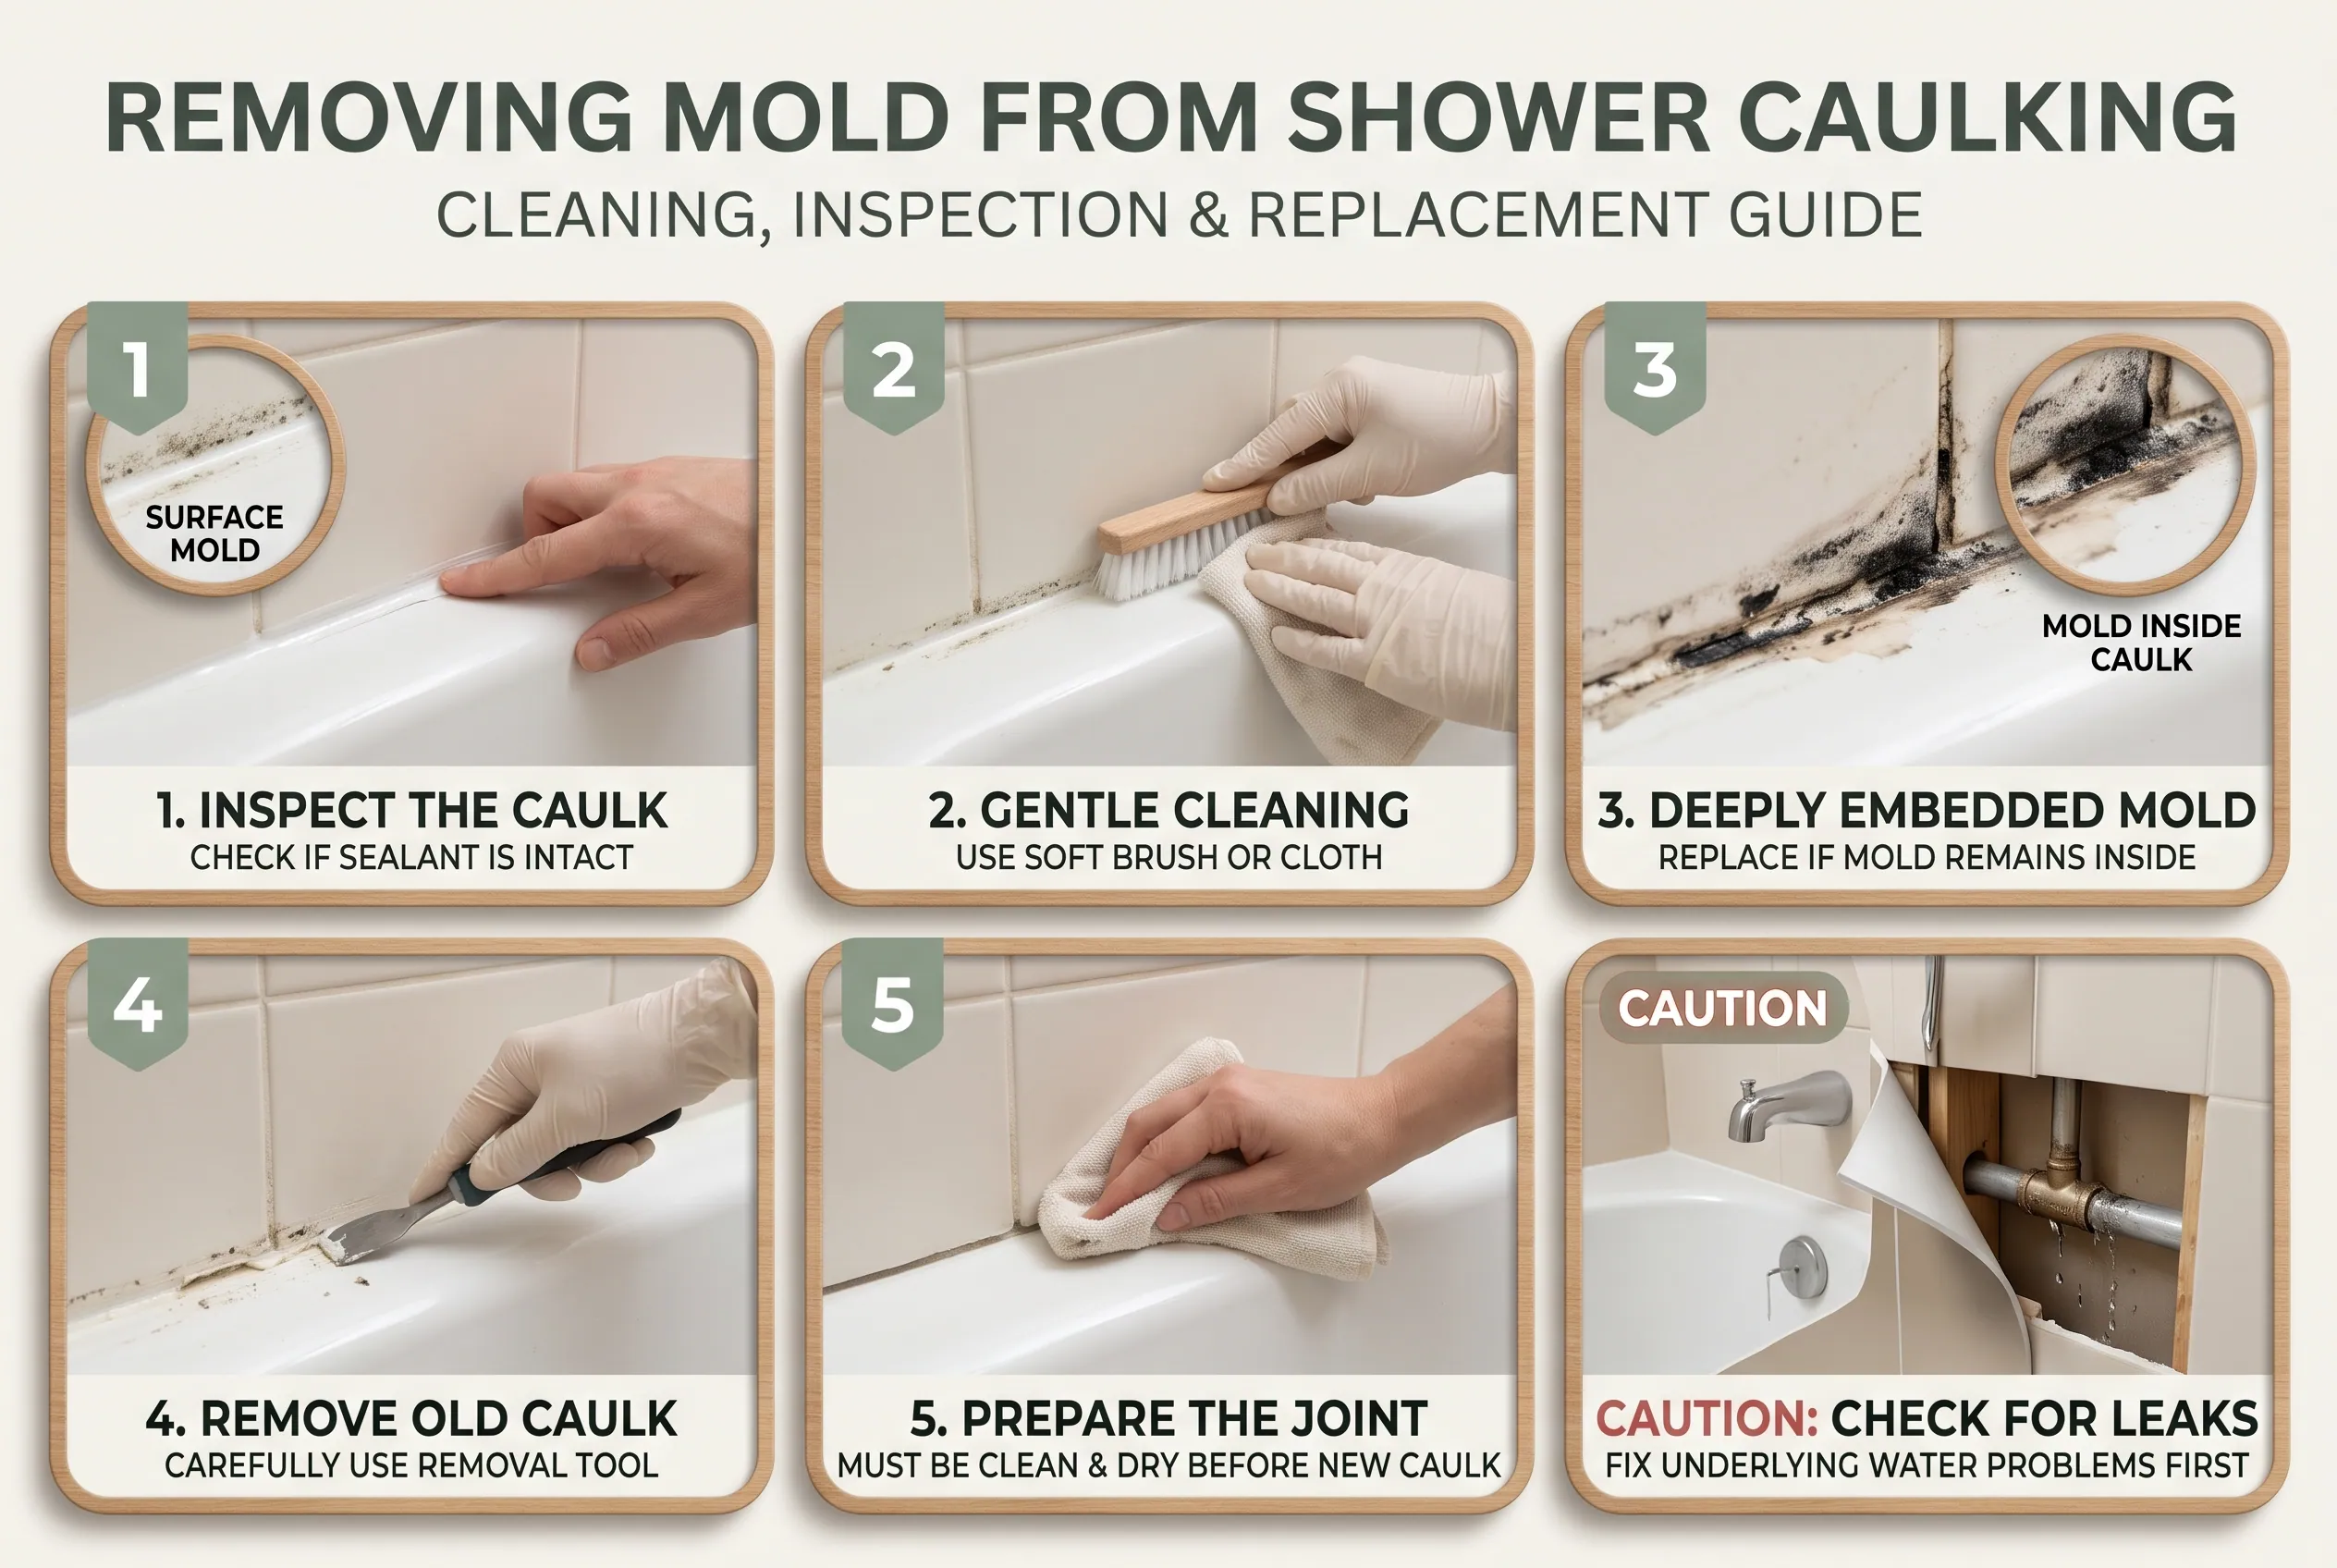
Silicone caulk is the flexible material used to seal gaps around bathtubs, shower trays, sinks, and other bathroom fixtures.
Mold often appears on caulk because water collects along these joints. Soap residue and other dirt can also build up there.
First, inspect the sealant.
If the caulk is intact and the mold appears to be on its surface, try cleaning it with a suitable bathroom cleaner. Follow the product instructions and use a soft cleaning brush or cloth.
Avoid aggressive scrubbing that could pull away or damage the sealant.
However, cleaning may not solve the problem when mold has become deeply embedded in the caulk. Cracked, loose, or deteriorating sealant also needs attention.
When should you replace shower caulk?
Consider replacement when:
- Dark growth remains inside the sealant after suitable cleaning.
- The caulk is cracked or peeling.
- Water appears to be entering the joint.
- The sealant has gaps or no longer forms a proper seal.
Before replacing it, make sure the moisture problem has been addressed.
Remove the old sealant carefully using an appropriate caulk-removal tool. Follow the new sealant manufacturer’s preparation instructions. The joint must be clean and sufficiently dry before applying replacement caulk.
For example, if the shower has a leaking fixture behind the wall, replacing the visible caulk alone will not solve the underlying water problem.
How to Remove Mold From Bathroom Walls and Ceilings
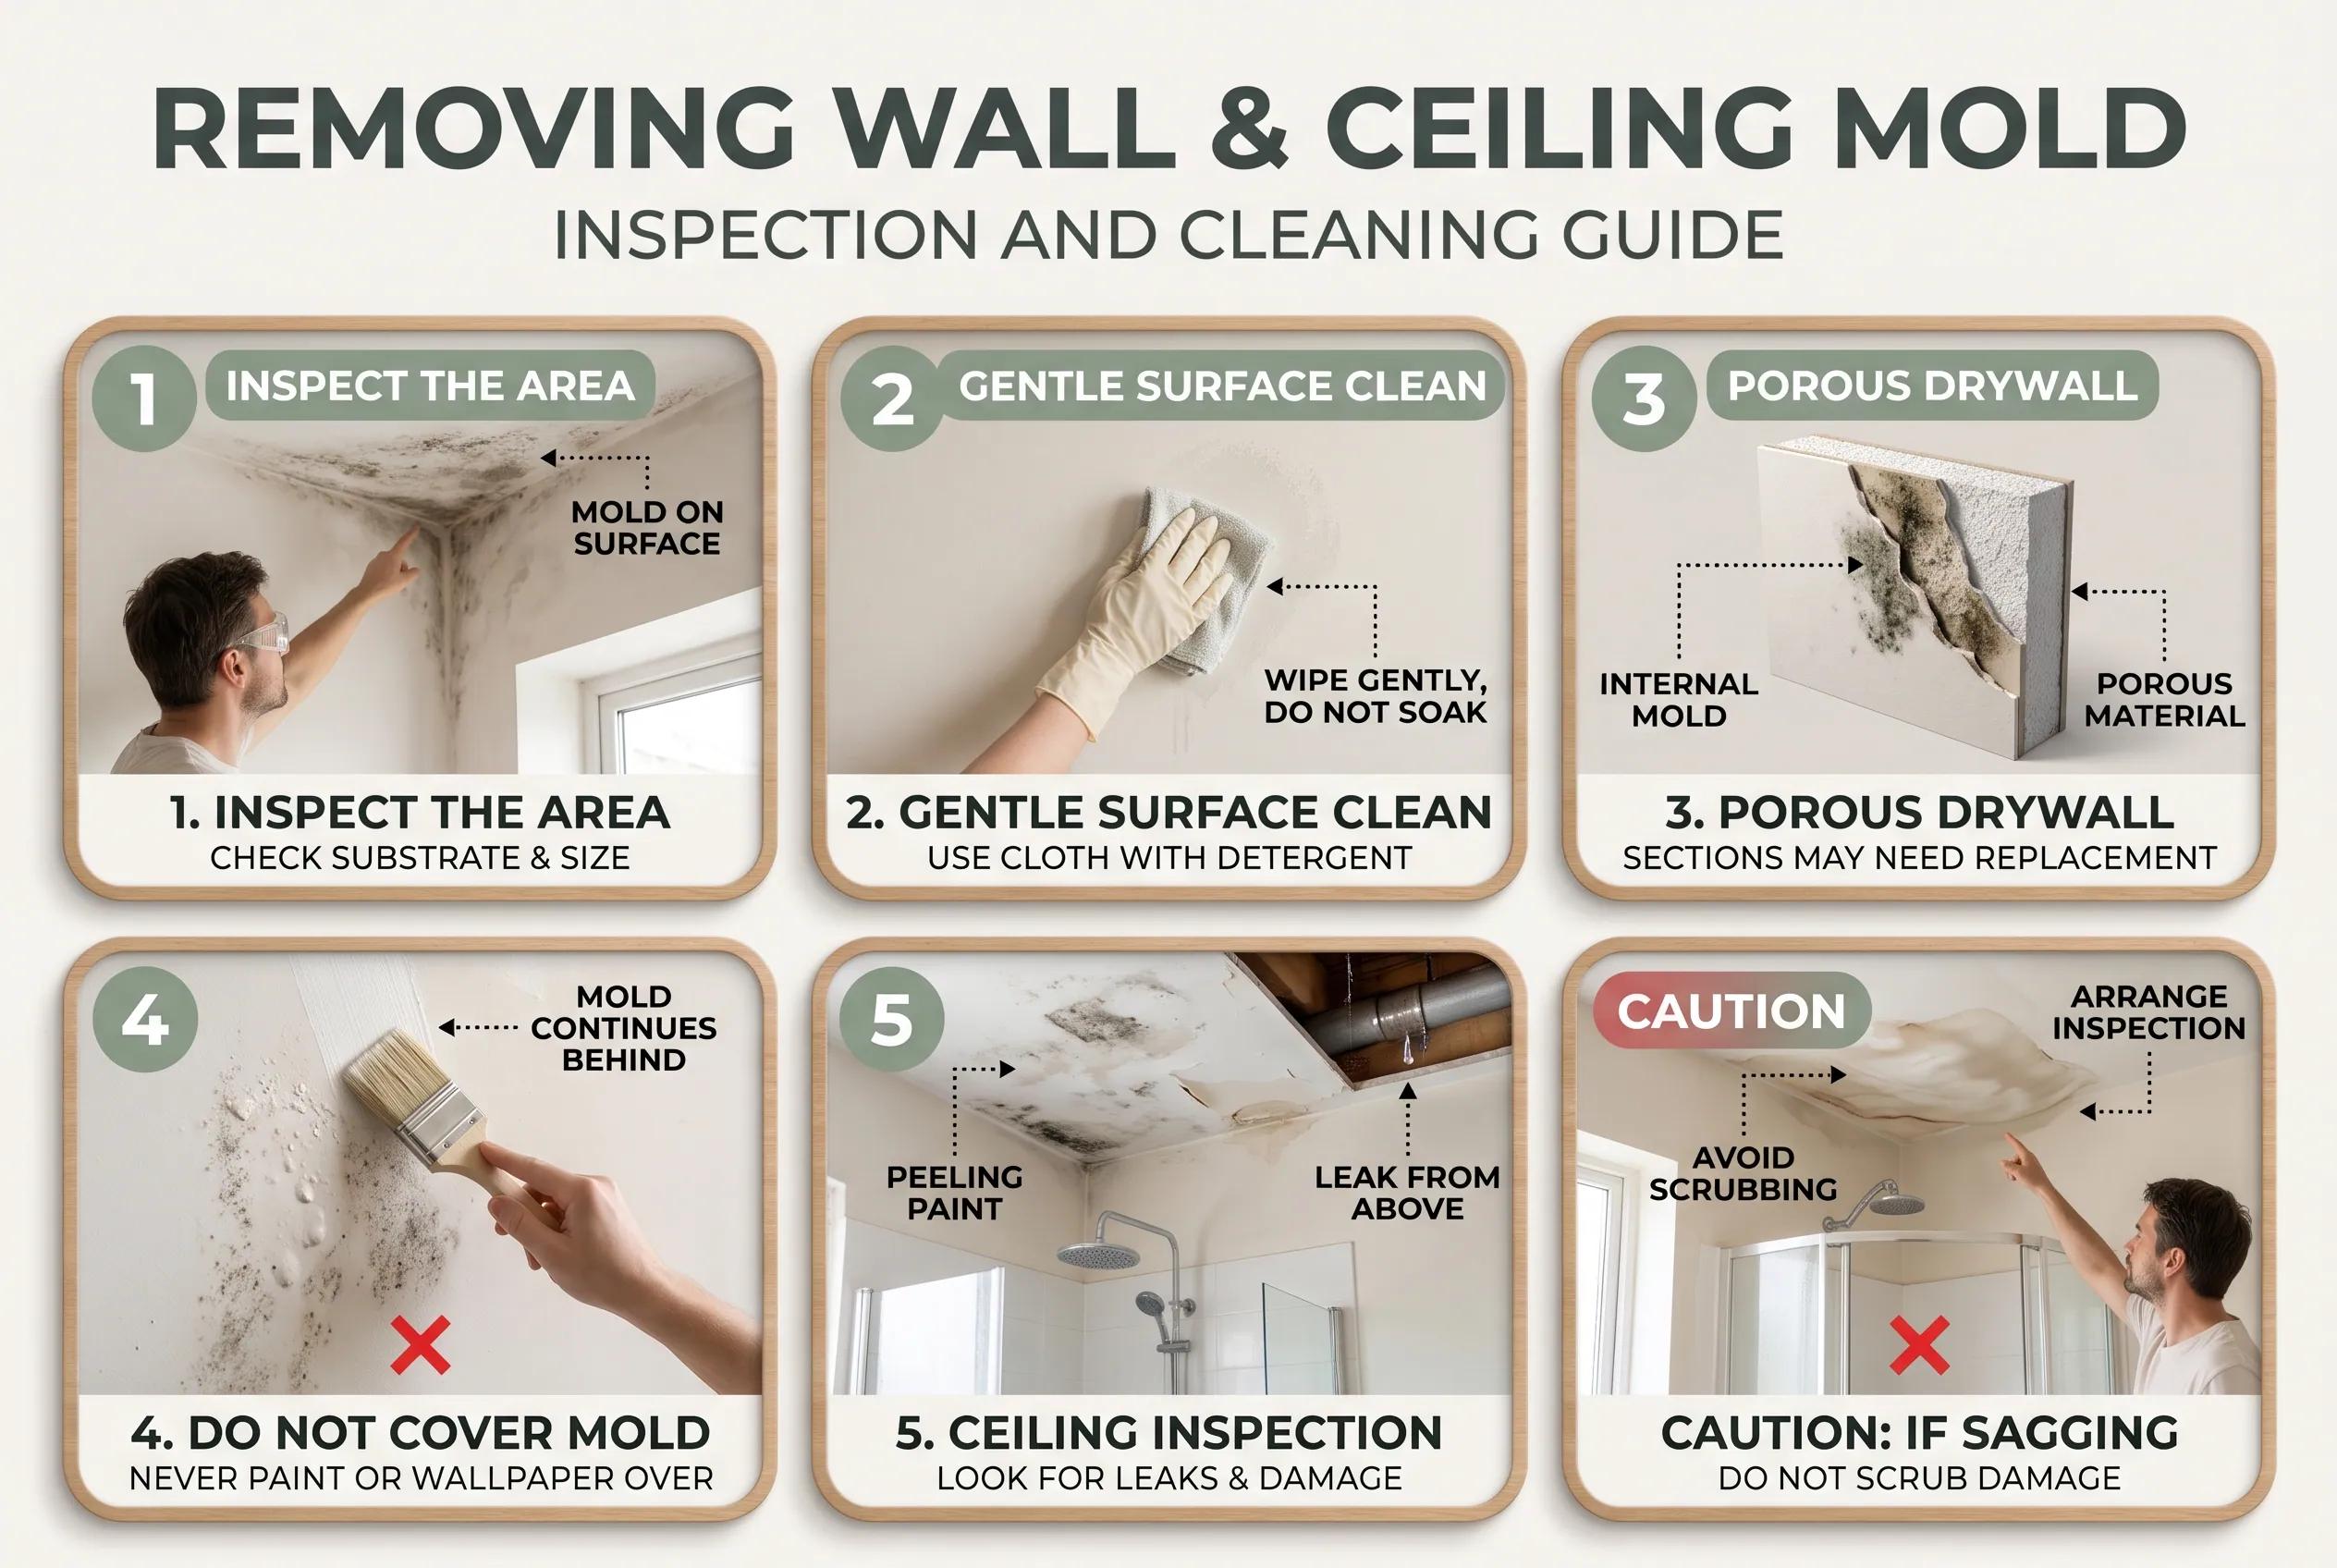
Mold on walls and ceilings needs more care because the surface may be painted drywall, plaster, or another material.
Start by checking the condition of the affected area.
For small areas on suitable washable painted surfaces:
Use a cloth with detergent and water. Clean gently, avoid soaking the wall, and dry the surface.
Check the paint afterward. Peeling, bubbling, or soft areas may indicate moisture damage beneath the paint.
For mold on drywall:
Drywall is porous. Its paper surface and inner material can absorb moisture. When mold grows inside damaged drywall, surface cleaning may not remove the full contamination.
Damaged or mold-affected sections may need replacement.
Do not paint over visible mold or cover a water-damaged wall with wallpaper. The problem can continue behind the new finish.
For mold on bathroom ceilings:
Look closely for:
- Dark patches above the shower.
- Water stains near ceiling joints.
- Peeling ceiling paint.
- Soft or sagging sections.
- Signs of leaking pipes or water from the floor above.
Ceiling mold is sometimes linked to poor ventilation, but it may also indicate a leak. Do not automatically assume that every ceiling stain comes from shower steam.
If the ceiling is soft, sagging, or visibly water-damaged, avoid scrubbing it. Arrange an appropriate inspection.
What About Mold Around the Bathroom Sink Drain?
Dark or slimy material around a bathroom sink drain may be mold, but it can also be a mixture of soap residue, dirt, and other organic buildup.
Remove visible surface buildup using a suitable bathroom cleaner. Clean the drain cover and surrounding sink surface, following the manufacturer’s care instructions.
Rinse and dry the surrounding area.
If the problem repeatedly returns, check for:
- Slow drainage.
- Standing water around the drain.
- Leaks beneath the sink.
- Damaged seals around plumbing fixtures.
Do not randomly pour different chemicals into the drain. Use a drain-cleaning product only when it is suitable for the plumbing and follow its instructions.
Which Bathroom Mold Cleaner Should You Choose?
You may see many products advertised for bathroom mold. Some contain bleach, while others use different cleaning ingredients.
The important question is whether the product suits the surface and removes the visible contamination safely.
1. Detergent and Water
This is a practical starting point for suitable hard bathroom surfaces.
The EPA recommends physically cleaning mold from hard surfaces with detergent and water. It is usually unnecessary to begin with the strongest chemical available.
This method is suitable for routine cleaning of many washable surfaces, including tiles and glass.
2. Commercial Bathroom Cleaners
A commercial bathroom cleaner may help remove soap residue, dirt, and surface mold.
Before using one, check its label for:
- Approved surfaces.
- Required contact time.
- Whether rinsing is necessary.
- Ventilation instructions.
- Protective equipment.
- Chemical mixing warnings.
A cleaner suitable for ceramic tiles may not be suitable for natural stone, colored grout, or delicate finishes.
3. White Vinegar
White vinegar is a popular household cleaning suggestion.
However, vinegar is not a universal solution for every bathroom mold problem. The EPA and CDC guidance reviewed for this article does not establish a single vinegar recipe or waiting time that works for all moldy surfaces.
Do not mix vinegar with bleach or other cleaning products.
Use a product specifically intended for the affected surface when you need more dependable material-care instructions.
4. Hydrogen Peroxide
Hydrogen peroxide also appears in many homemade mold-cleaning recipes.
However, homemade mixtures that combine peroxide, dish soap, baking soda, and water should not be presented as a guaranteed way to kill mold roots.
Hydrogen peroxide can affect certain finishes and materials. Before considering a product containing it, check whether the material manufacturer approves its use.
Do not combine it with other household chemicals.
5. Chlorine Bleach
Bleach can help remove certain stains and may be used for suitable cleanup situations, but it should not be your automatic first choice.
The EPA does not recommend routine use of biocides such as bleach for ordinary mold cleanup.
If bleach is appropriate for the surface and situation, follow the product label. CDC guidance gives a maximum of one cup of household laundry bleach per gallon of water for appropriate cleanup situations. Product instructions may require a different approach.
Bleach can also damage colored materials and some bathroom finishes.
Never mix it with vinegar, ammonia, or another cleaner.
My recommendation: Start with detergent and water for suitable hard surfaces. Choose specialist products only when their instructions match the affected material. When mold affects porous materials or returns repeatedly, investigate the underlying problem instead of buying stronger cleaners.
How to Get Rid of Mold in Bathroom Areas and Prevent Its Return
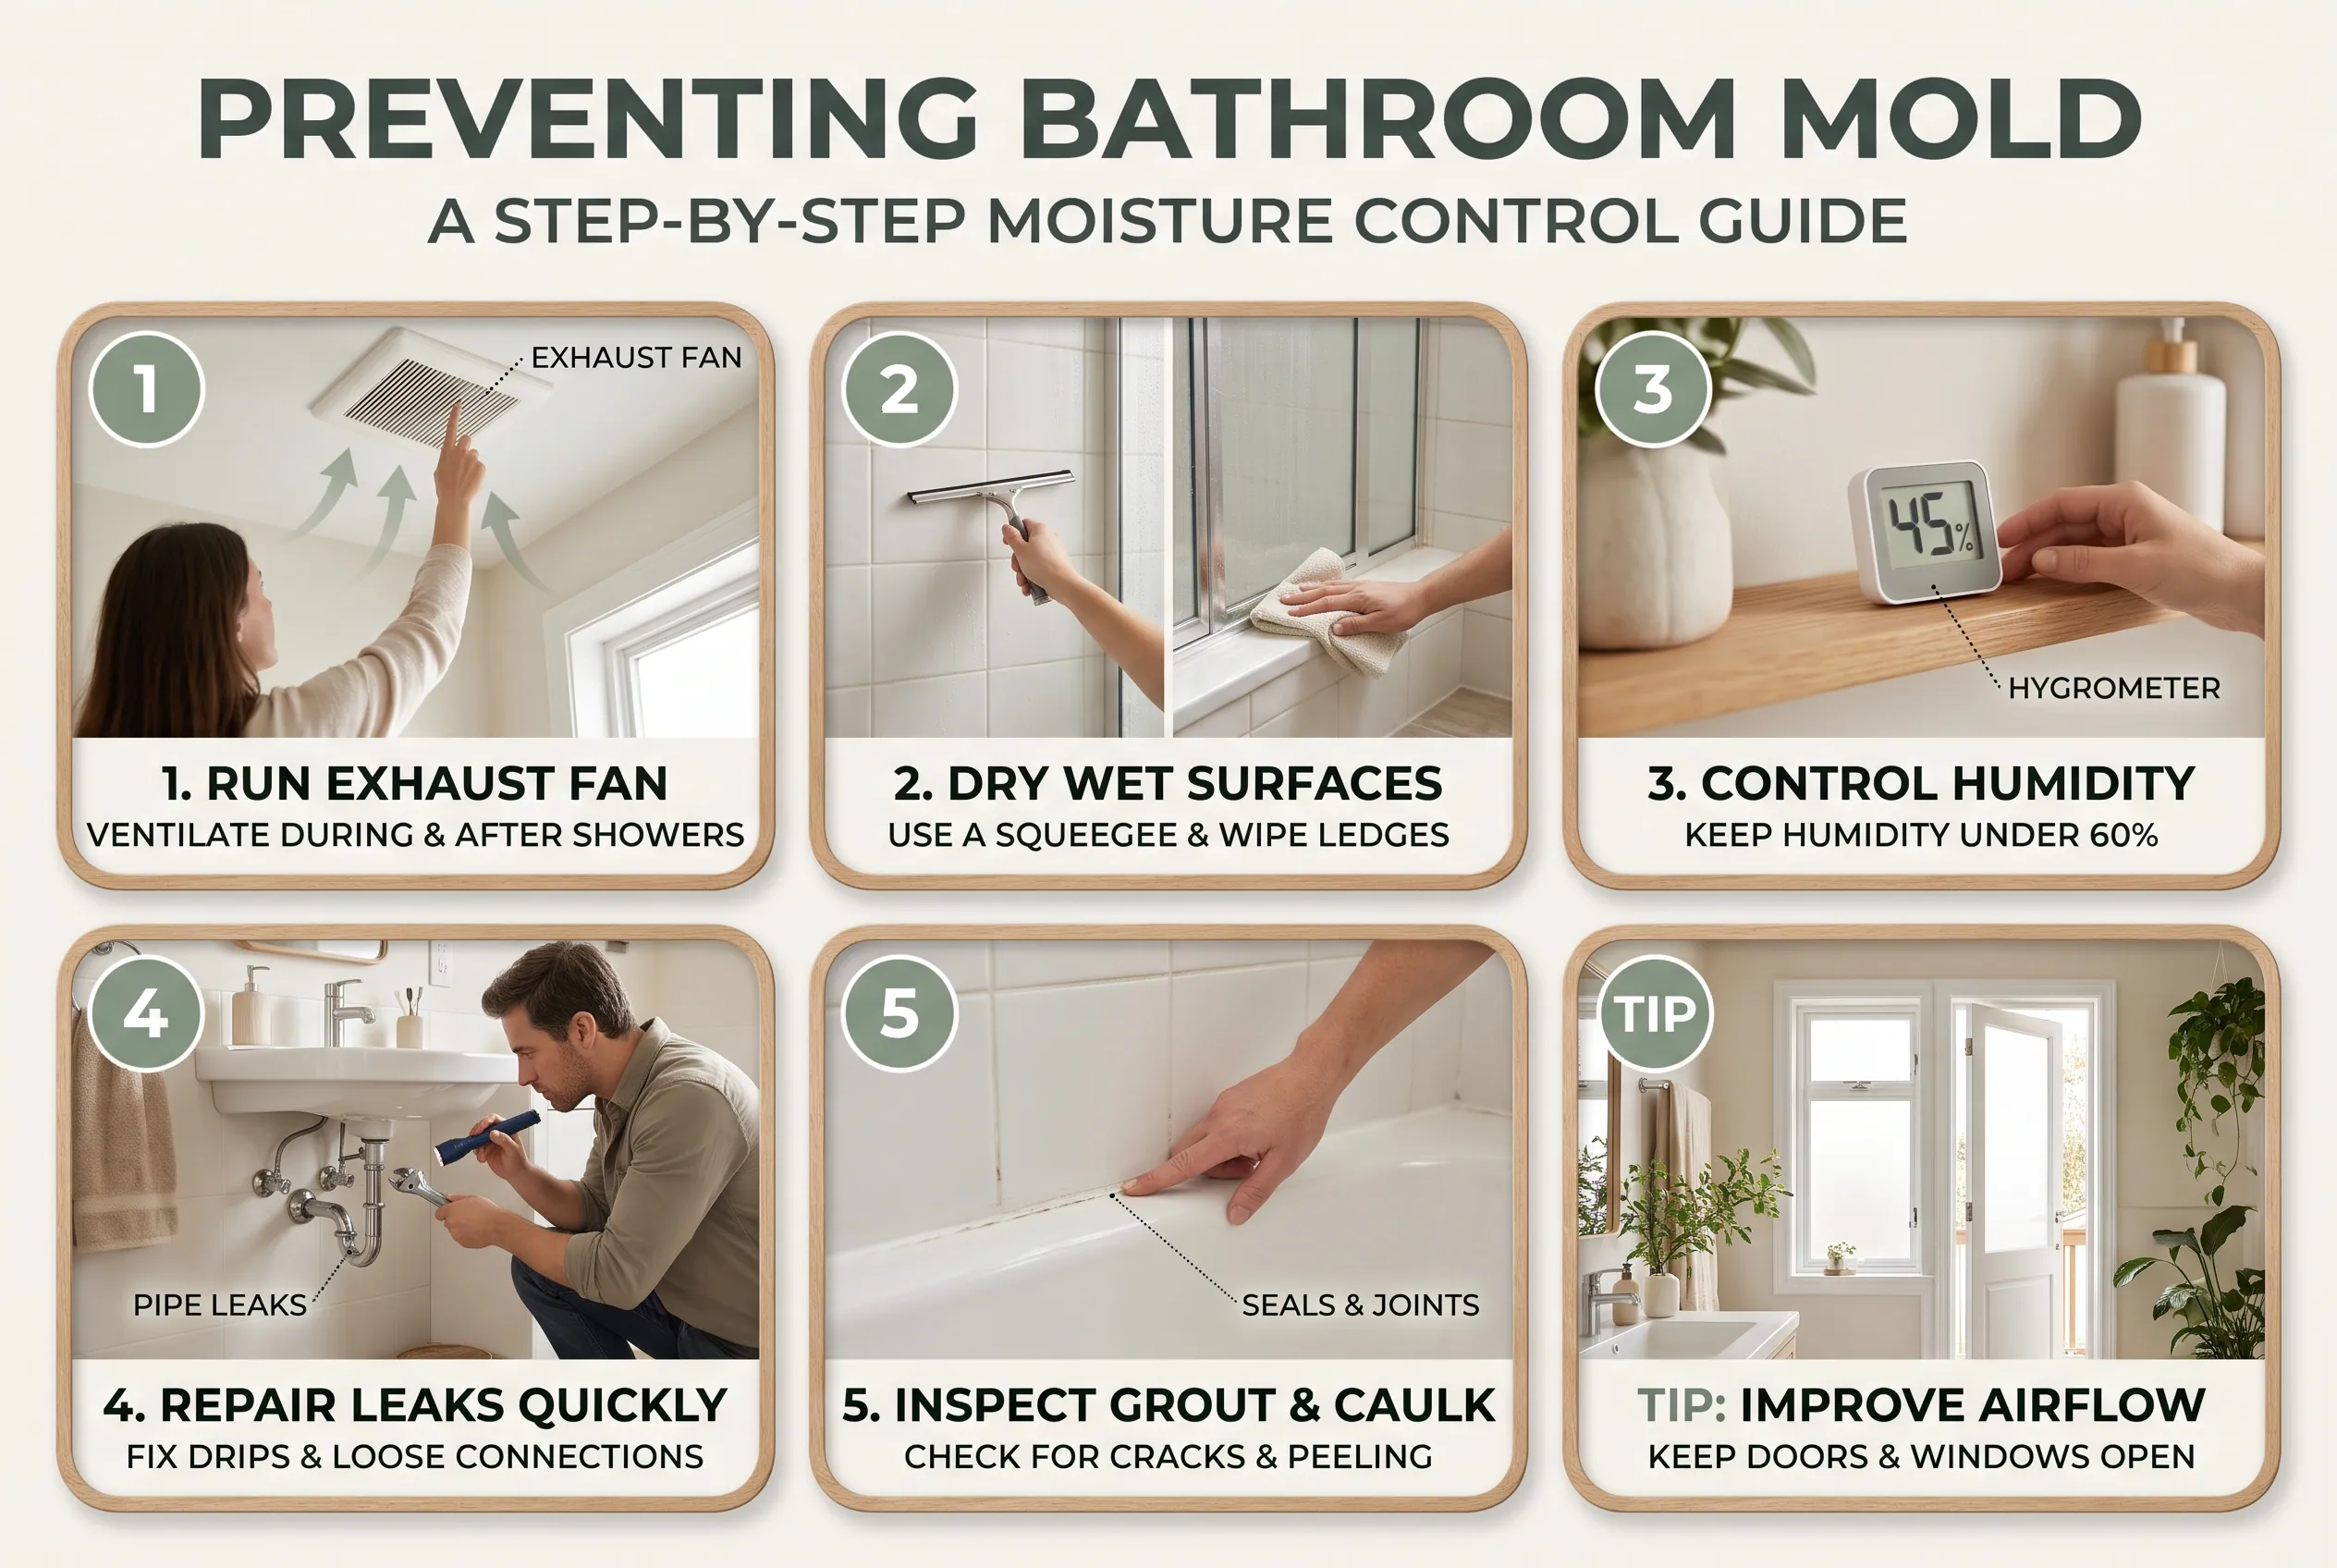
Removing existing mold is only part of the job. Preventing future growth means controlling moisture.
A bathroom that stays damp for long periods gives mold more opportunities to grow.
Run the Exhaust Fan During and After Showers
An exhaust fan removes humid air and helps reduce condensation.
Turn it on during your shower and keep it running afterward to help clear moisture.
The exact time depends on the bathroom, fan capacity, and humidity level. Follow the fan manufacturer’s instructions.
If your bathroom has no exhaust fan, open a window where practical and improve airflow. Renters should report ventilation problems to the property manager.
Dry Wet Surfaces
Water left on shower walls, glass doors, and corners can support mold growth.
After showering:
- Use a squeegee on glass and tiled walls.
- Wipe standing water from ledges.
- Hang towels so they can dry.
- Avoid leaving wet bath mats on the floor.
- Keep shower curtains spread out rather than bunched together.
These small habits reduce the time surfaces remain wet.
Keep Indoor Humidity Under Control
Humidity measures the amount of moisture in the air.
The EPA recommends keeping indoor humidity below 60%, ideally between 30% and 50%.
A small digital humidity meter can help you check the moisture level.
If humidity remains high, consider improving ventilation or using a dehumidifier when suitable.
Remember that a dehumidifier does not repair plumbing leaks or water entering through damaged walls. Find and fix the source of moisture first.
Repair Leaks Quickly
Even a small plumbing leak can create ongoing moisture behind bathroom fixtures.
Check regularly for:
- Dripping faucets.
- Leaking showerheads.
- Loose sink connections.
- Running toilets.
- Water beneath the vanity.
- Damp areas around pipes.
If you notice a leak, arrange a suitable repair. Do not cover wet areas with paint or sealant before they have been properly dried and assessed.
Inspect Grout and Caulk
Grout and caulk help protect joints from water entering unwanted spaces.
Inspect them regularly for cracks, gaps, peeling, or missing sections.
Repair damaged areas with materials designed for the specific bathroom surface. Follow the product instructions, including drying and curing requirements.
What If Your Bathroom Has No Window?
A bathroom without a window can still be kept relatively dry.
Focus on working mechanical ventilation, a properly maintained exhaust fan, and drying wet surfaces.
Keep the bathroom door open when practical after showering, provided this does not create a privacy or household safety issue.
If condensation remains heavy despite these measures, consider whether the fan is working properly or whether the room needs better ventilation.
Common Bathroom Mold Removal Mistakes to Avoid
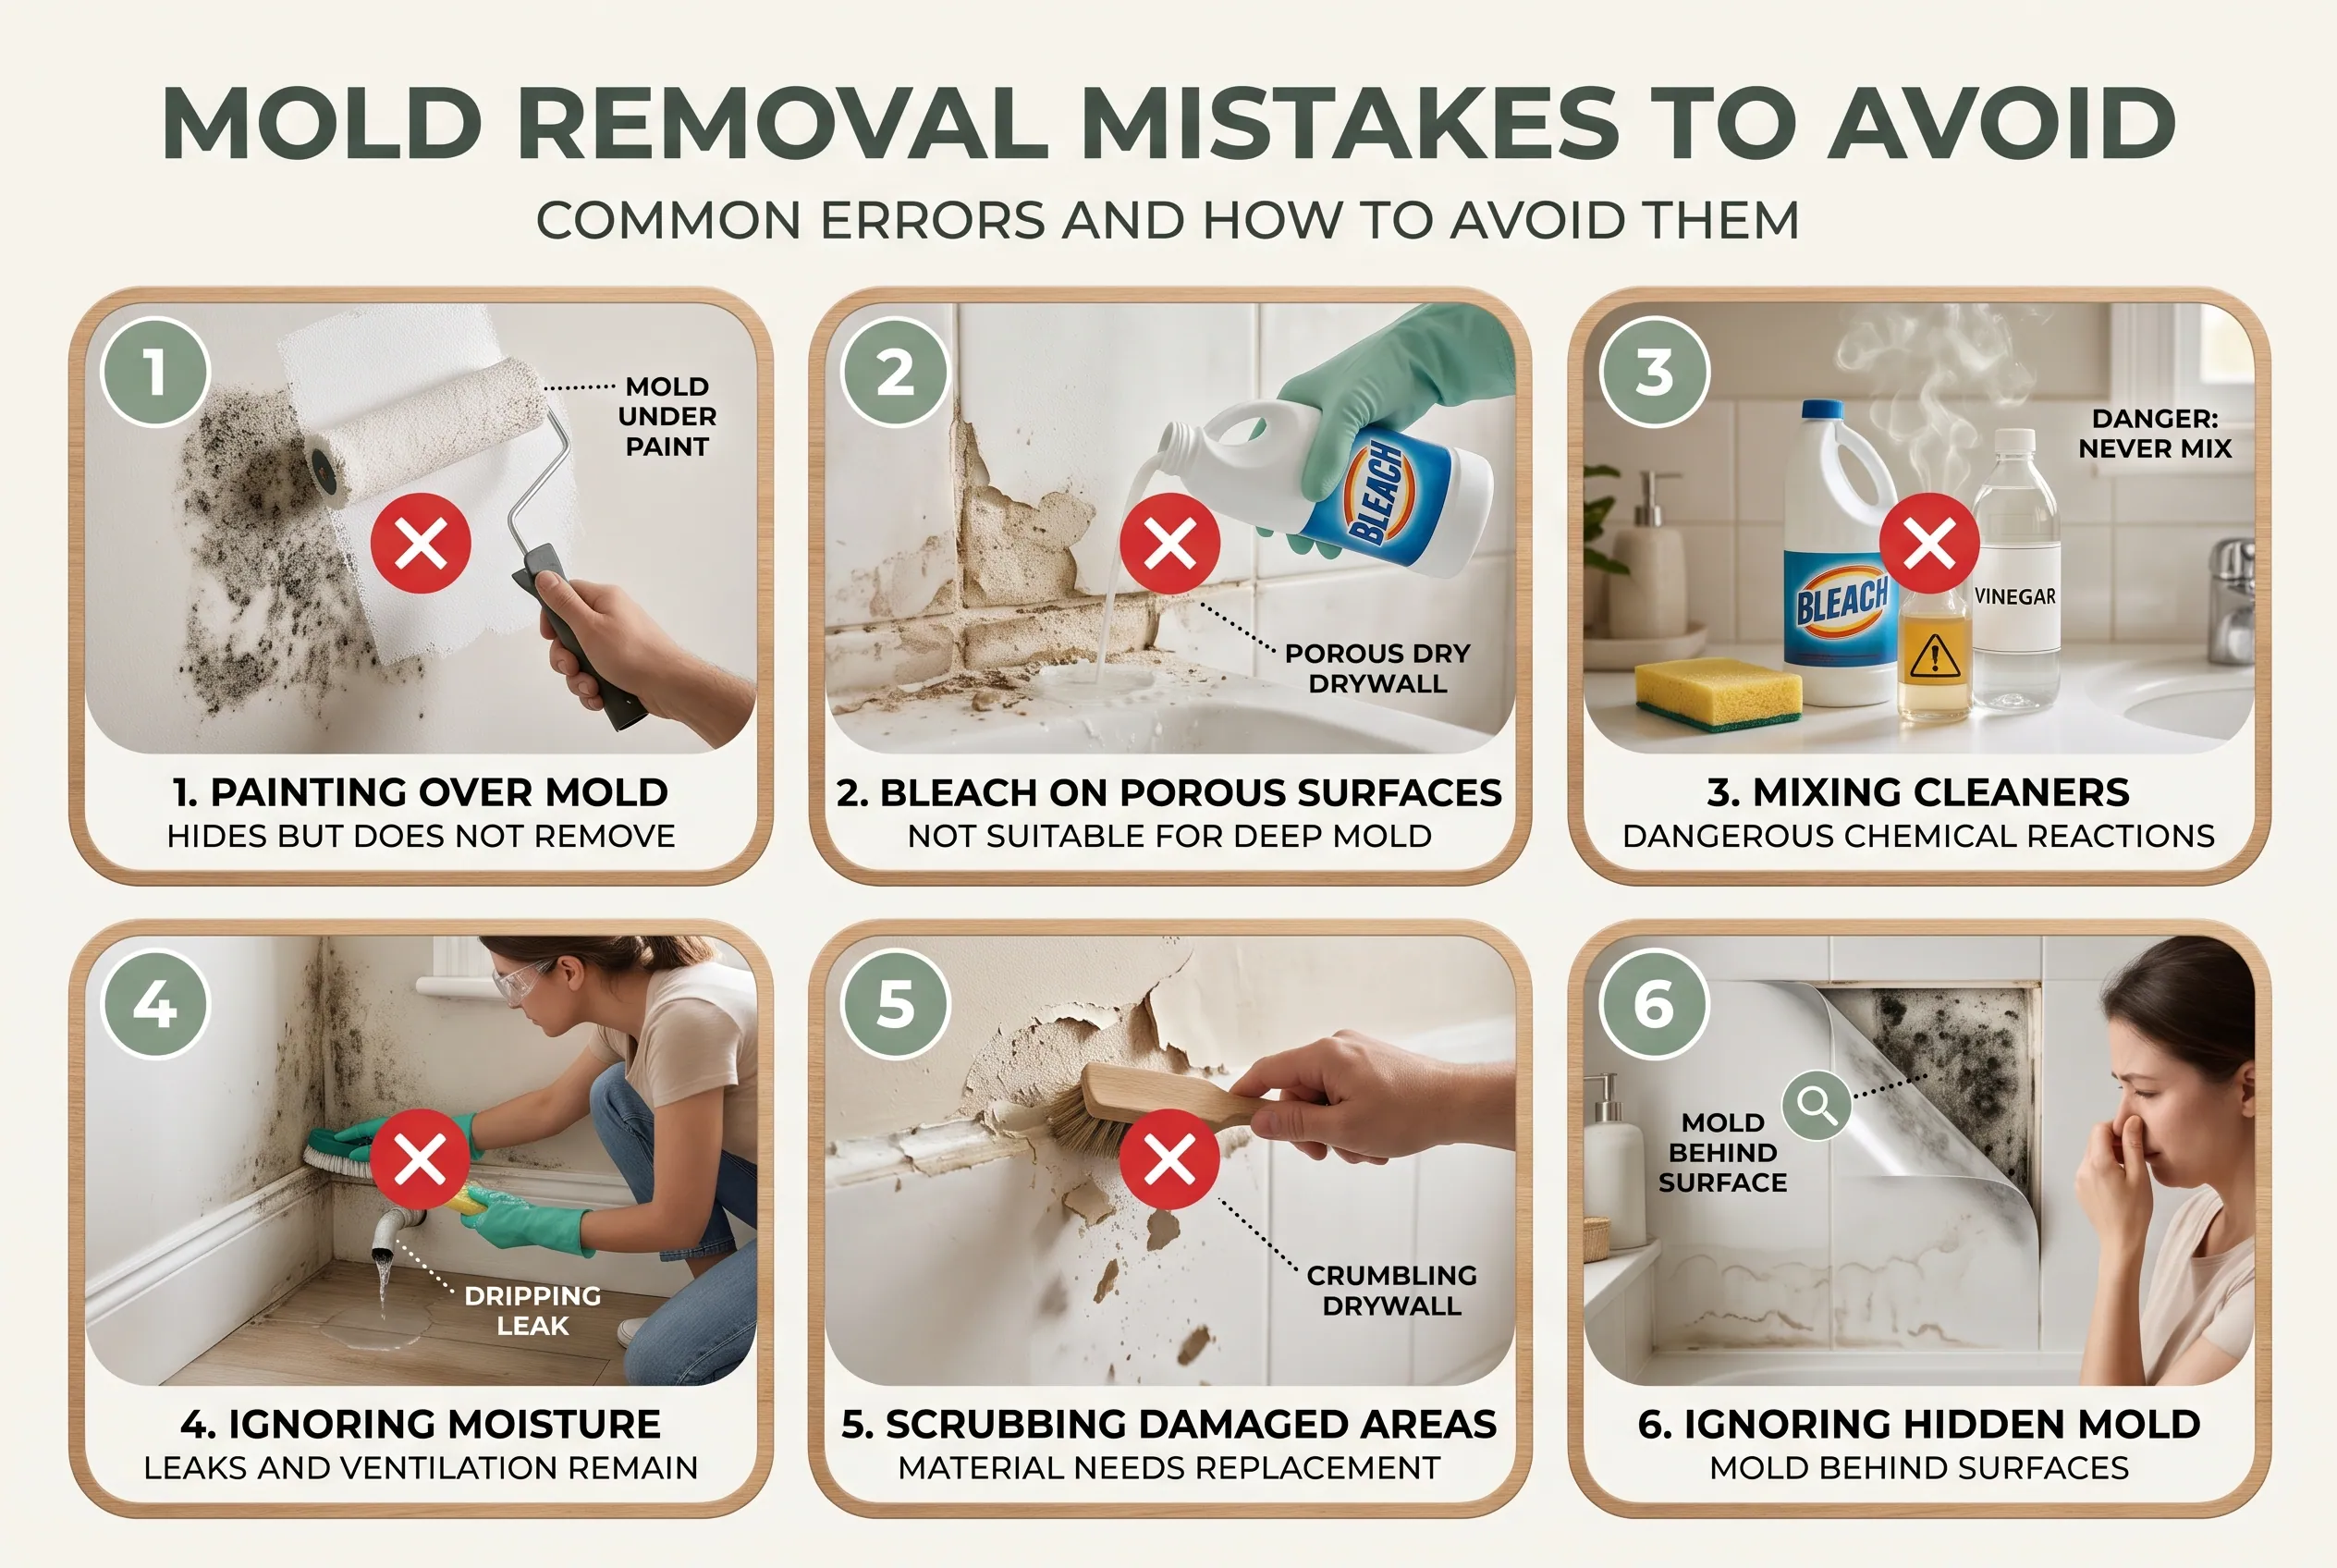
A few common mistakes can make bathroom mold problems harder to manage.
1. Painting Over Mold
Fresh paint can hide dark marks temporarily, but it does not remove mold or correct moisture.
Clean suitable surfaces, allow them to dry, and deal with any underlying damage before repainting.
Use paint only after the surface is properly prepared.
2. Using Bleach for Every Mold Problem
Bleach is not suitable for every surface or situation. It may also remove stains without addressing contamination within porous materials.
Choose a method based on the material and the nature of the problem.
3. Mixing Household Cleaners
Combining products can produce dangerous chemical reactions.
Use one cleaner according to its label. Never experiment with mixtures involving bleach, vinegar, ammonia, or other cleaning chemicals.
4. Ignoring the Moisture Source
Cleaning the same corner every week will not fix a leaking pipe or poor ventilation.
Inspect the surrounding area and look for a continuing source of water.
5. Cleaning Damaged Materials Repeatedly
Moldy drywall, deteriorating caulk, and damaged building materials may need replacement.
Repeated scrubbing is unlikely to restore a material that has absorbed moisture and deteriorated.
6. Ignoring Mold Because It Is Not Visible
A persistent musty smell, water stains, or repeated dampness may suggest a hidden moisture problem.
Investigate these signs instead of assuming the bathroom is fine because the visible tiles look clean.
When Should You Call a Mold Remediation Professional?
Some bathroom mold problems are not suitable for ordinary DIY cleaning.
Consider professional help when:
- The affected area is larger than approximately 10 square feet.
- Mold appears behind walls, under flooring, or inside inaccessible spaces.
- Extensive water damage has occurred.
- Sewage or contaminated water is involved.
- Mold may have spread through the heating or air-conditioning system.
- Mold keeps returning after the moisture source has been addressed.
- You cannot safely perform the cleanup yourself.
A professional can assess the affected materials, investigate moisture sources, and recommend suitable removal or replacement.
What Affects Bathroom Mold Removal Costs?
Professional remediation costs vary across the United States.
Several factors influence the total:
- Size of the affected area.
- Type of contaminated material.
- Whether drywall, flooring, or insulation needs replacement.
- Accessibility of the affected space.
- Whether plumbing repairs are necessary.
- The amount of containment and cleanup required.
- Local labor and disposal costs.
A small surface-cleaning job may cost much less than removing damaged drywall and repairing a hidden plumbing leak.
Ask for an itemized estimate that separates mold removal, material replacement, plumbing repairs, and restoration work.
For larger jobs, getting more than one estimate can help you compare the proposed work.
What Should Renters Do About Bathroom Mold?
Renters may not be allowed to remove fixtures, replace caulk, or repair ventilation systems.
If you rent your home and notice recurring mold:
- Photograph the affected areas.
- Record when you first noticed the problem.
- Report leaks or ventilation problems to the landlord or property manager.
- Keep written records of your communication.
- Avoid major repairs that you are not authorized or qualified to perform.
Rental responsibilities and legal requirements vary by state and local area. Check your local housing guidance when necessary.
Frequently Asked Questions About Bathroom Mold
1. How Do I Permanently Get Rid of Mold in My Bathroom?
There is no guaranteed permanent treatment that works without addressing the moisture problem. Clean suitable hard surfaces, remove damaged materials when necessary, repair leaks, improve ventilation, and keep surfaces dry. Regular checks help you identify returning growth early.
2. What Does Toxic Mold Look Like in a Bathroom?
Mold can appear as black, green, brown, gray, or other dark patches. However, color alone cannot tell you whether mold is toxic or identify its species.
Do not assume that every black patch is a particularly dangerous type of mold. Visible mold should be removed safely regardless of its color.
3. What Permanently Kills Mold?
Mold must be physically removed from affected surfaces, and the moisture that supports its growth must be controlled. Simply spraying a chemical or killing visible mold does not guarantee that the problem is solved.
Porous materials with significant mold damage may require replacement.
4. What Are the First Signs of Mold-Related Health Problems?
Some people exposed to indoor mold may experience a stuffy nose, coughing, wheezing, irritated eyes, sore throat, or skin irritation.
People with asthma, allergies, and certain health conditions may be more sensitive.
These symptoms can have several causes, so they do not prove that bathroom mold is responsible. Speak with a healthcare professional when symptoms persist or breathing problems develop.
5. Do I Need a Professional Mold Test Before Cleaning?
Usually, no. The EPA explains that visible mold generally does not need laboratory identification before cleanup.
The practical priority is removing the mold, addressing moisture, and determining whether damaged materials need replacement.
Final Practical Advice
Getting rid of bathroom mold starts with understanding where it grows and why the surface stays damp.
Clean suitable hard surfaces with detergent and water, protect yourself during cleanup, and replace damaged materials when necessary. Most importantly, fix leaks, improve ventilation, and keep bathroom surfaces dry.
A clean bathroom is easier to maintain when moisture does not have time to build up. Focus on that first, and you will have a much better chance of preventing the same mold problem from returning.
Disclaimer
Bathroom conditions, building materials, budgets, and cleaning needs vary. Follow product instructions and take suitable safety precautions. Seek qualified professional help for extensive mold growth, hidden water damage, contaminated materials, or problems involving plumbing, ventilation, or building structures.